The Great Camera Bag Dilemma
Every photographer I know has at least one thing in common: a closet full of camera bags that almost—but not quite—fit the bill. I’ve been there too. From messenger-style leather bags that look stylish in a café but dig into your shoulder after two blocks, to bulky hiking packs that could double as portable closets, I’ve tested more than I’d like to admit.
Choosing the right camera bags for the road isn’t about finding the fanciest one. It’s about balance—comfort, practicality, protection, and yes, a little style. Whether I’m wandering cobblestone streets in small towns, photographing wildlife along a backroad, or hopping between islands in Hawaii, the bag I carry affects everything from how easily I can reach my camera to how inspired I feel to keep shooting.
In this post, I’ll walk through what I’ve learned about choosing the right bag for travel photography—the kind that fits your body, your camera gear, and your style of adventure. Along the way, I’ll reference a few related posts, like Travel and Photography Tips: Balancing the Journey, Mastering Composition on the Road, and Wildlife Encounters on America’s Back Roads, because the right bag isn’t just about what you pack—it’s about how you shoot.
What to Look for in a Travel Camera Bag
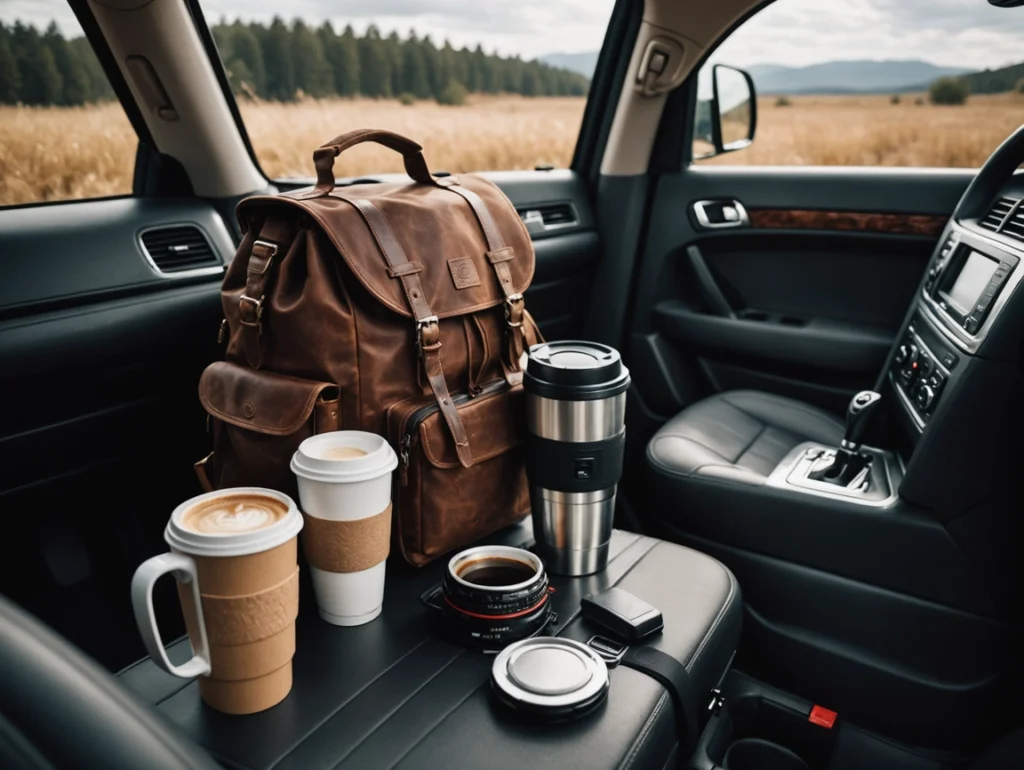
Whenever I’m packing for a trip—whether I’m hopping between islands in Hawaiʻi or wandering quiet backroads in Upstate NY or Scenic Drives and Road Trips Across America —the camera bag isn’t just another accessory. It is the accessory: the one item I carry every step of the way. So when I’m picking a bag, I focus on four big design questions: comfort, accessibility, protection, and weather-proofing. Let’s unpack each of them.
1. Comfort
If your bag isn’t comfortable, you’ll stop carrying it (or worse: you’ll carry it poorly). On one trip I lugged a messenger-style leather bag that looked great in the café—but by the end of the day my shoulder hated me. With travel photography, you’re often walking, hopping in and out of vehicles, standing on uneven ground, or leaning into weird angles. So I look for:
- wide, padded straps or a hip/waist belt if it’s a backpack
- a back-panel with ventilation (so you don’t become a sweaty mess)
- balanced weight distribution (a heavy lens at the top of a skinny bag is a recipe for soreness)
The most important key… is LIGHTWEIGHT.
2. Accessibility
Your bag has to let you shoot, not slow you down. I want to be ready when a perfect golden-hour moment or a shy hawk swoops into frame. That means:
- side or sling access so I can reach the camera without fully unpacking
- pockets for small accessories (batteries, cards, lens cloths) so I’m not rummaging like I’m digging for buried treasure
- tripod/strap loops or quick-attach points if I’m using heavier gear
One review of “camera bags for travel” highlighted easy access and dedicated areas for gear as key features.
3. Protection
Travel throws curve-balls: checked-bags, airport security lines, bouncing around in a rental car, wandering trails with spray and grit. Your gear deserves protection. I look for:
- padded dividers/compartments so lenses don’t clank or shift
- sturdy construction that keeps the bag standing up and retaining shape
- preferably a compartment lock or zipper safeguard (especially in crowded markets)
4. Weather-proofing & Durability
Finally—and this is non-negotiable—your bag must hold up to weather, the unexpected, and travel wear. I’ve walked through drizzle on Hawaiʻi’s Big Island, climbed muddy trails in Wyoming, and had sand wind-blasted in coastal towns. My camera bag should shrug that off. So I check for:
- water-resistant (or waterproof) fabric, rain cover, sealed/covered zips
- rugged outer shell or at least reinforced stitching at stress points
- fabrics that don’t show wear instantly (I like muted earthy tones that match my brand palette)
In practice: My personal requirements
Here’s how I apply those four criteria in my world of slow-travel, “quiet moment” photography:
- I carry only one camera body + two lenses (rarely three) on most trips—so I want bag volume to match, not exceedmy load. Too much space = temptation to over-pack.
- My bag doubles as everyday carry (tablet, charger, water bottle)—so side compartments and laptop/travel organizer pockets matter.
- I aim for a color palette that fits with my brand aesthetic (earthy greens, warm greys) so the bag doesn’t visually clash on my site.
- I choose a sling or backpack style rather than shoulder-only bags, because I often pull stops in ideal photo spots and need a hands-free, balanced option.
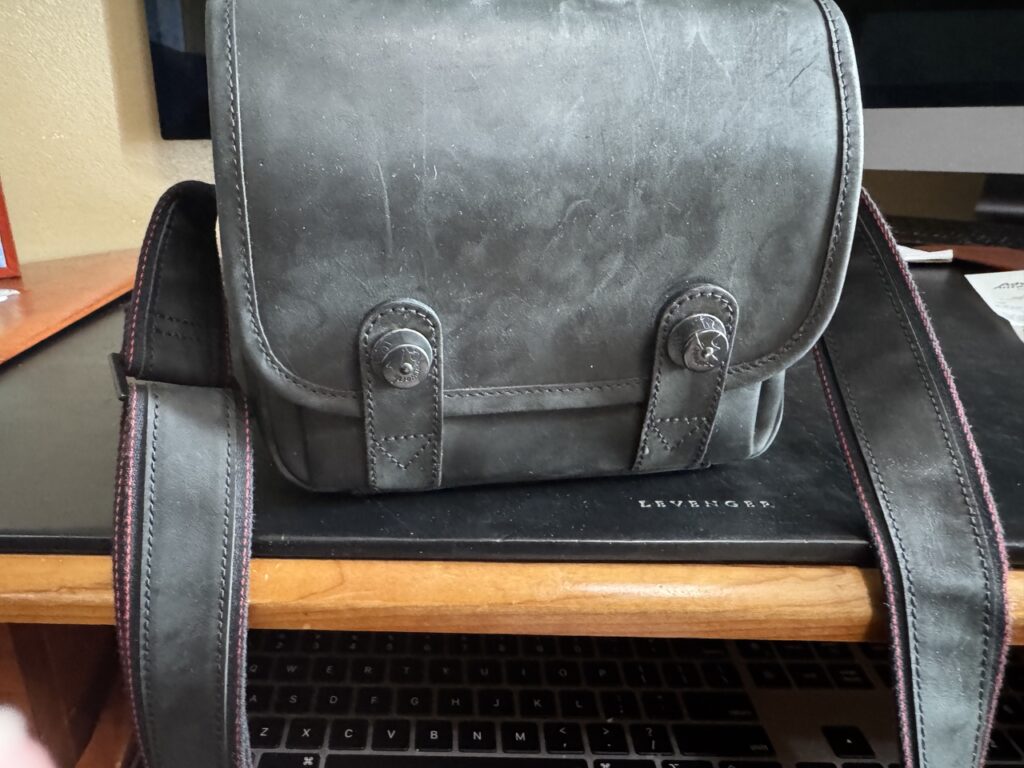
Size and Capacity — Balancing Gear, Portability, and Carry-On Rules
One of the trickiest parts of finding the right camera bag is figuring out how much it should hold. I’ve learned the hard way that “just in case” is dangerous language when it comes to gear. The more space you have, the more you’ll fill it — and before you know it, you’re hauling half your studio through an airport terminal.
When I travel, I think in terms of mobility over maximum storage. On the road, that means a bag that fits everything I actually use — not everything I own.
Carry-On Friendly Is Non-Negotiable
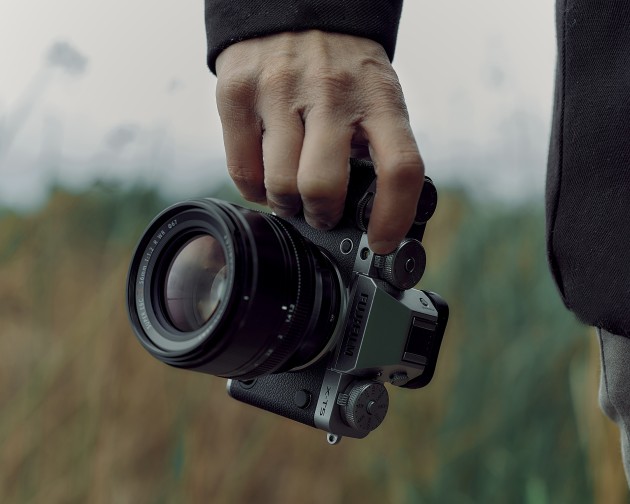
Airlines can be unpredictable, but overhead bins have one universal truth: they shrink when you approach with a large camera bag. I always check airline carry-on limits before flying, especially on smaller regional or island flights like the ones between Oahu and Kauai. My goal? A bag that slides easily under the seat if needed — because there’s no way my Leica Q3 or Fujifilm X-T5 are ever getting checked.
The “Two-Lens Reality Check”
When I first started building my kit, I wanted to be prepared for everything — landscapes, wildlife, low-light cafés, and street scenes. But after several long trips, I realized my go-to combo rarely changes: one wide-to-mid zoom and one telephoto. For me, that’s the Fujifilm XF 16-80mm and XF 70-300mm + 1.4x TC, or my Leica Q3 when I want to travel light. So my bag only needs space for those, plus a few batteries, filters, and cards.
That’s why I love compact bags with configurable dividers. They keep things snug, easy to reach, and prevent my gear from bouncing around every time we hit a pothole on some backroad.
Weight vs. Balance
A smaller bag is tempting, but don’t sacrifice balance. A perfectly fitting backpack with a chest strap or waist belt can feel lighter than a smaller shoulder bag because the weight is evenly distributed. When I’m walking around places like the Kīlauea Lighthouse or the winding trails above Waimea Canyon, that comfort makes the difference between enjoying the day and constantly readjusting straps.
Room for Non-Camera Essentials
I always leave room for travel items: a small notebook, sunglasses, a granola bar (or two), and my phone charger. I also like a slim front pocket for a passport and boarding pass — no more awkward airport juggling acts.
In practice: Finding the sweet spot
If your bag can hold one body, two lenses, a few accessories, and some personal items — and still fit under a plane seat — you’ve found your match. Anything more is probably overkill unless you’re traveling specifically for a commercial shoot.
For more on how I plan travel setups, check out Travel and Photography Tips: Balancing the Journey and How I Plan and Photograph the Perfect USA Road Trip. Both posts touch on the same principle: gear should support your experience, not weigh it down.
Section 4: Bag Styles — Sling, Backpack, and Shoulder (Which One Fits Your Road-Trip Style?)
After years of chasing light across small towns, national parks, and Hawaiian coastlines, I’ve come to realize there’s no perfect camera bag — only the one that best fits how you travel. Each style has its pros, quirks, and “why did I buy this?” moments. Let’s break them down.
Sling Bags: Quick-Draw Convenience
Sling bags are the “fastest guns in the West.” You can swing them from back to front in one smooth motion and grab your camera in seconds — no need to set anything down in the dirt or fumble with two shoulder straps.
They shine for day trips, city strolls, and spontaneous photo stops when you don’t need a full kit. On Oahu, for example, I often use my smaller sling when exploring spots like Green World Coffee or Keneke’s Grill — it holds my Leica Q3, a spare battery, and my notebook for quick jot-downs.
Pros:
- Lightning-fast access
- Compact and light
- Keeps gear minimal and close to you
Cons:
- Limited space (you’ll have to choose your lenses wisely)
- Can cause shoulder fatigue after long days if heavily loaded
Ideal for: photographers who love flexibility, minimal setups, and those “jump-out-of-the-car” roadside shots.
Backpacks: All-Day Adventure Partners
Backpacks are the workhorses — and if you’re road-tripping through the Rockies or hiking to waterfalls on Kauai, they’re your best friend. The weight distributes evenly across both shoulders, and the larger volume gives you room for extras like snacks, rain gear, or even a small tripod.
I use mine for multi-stop trips, especially when my Fuji setup comes along with multiple lenses and filters. Many modern camera backpacks now open from the back or sides, so you don’t have to lay them face-down in the mud (thank you, whoever invented that feature).
Pros:
- Best for comfort and capacity
- Balanced weight and ergonomic support
- Fits more gear and personal items
Cons:
- Slower access — you’ll need to take it off for full setup changes
- Can be bulky in tight spaces or crowded markets
Ideal for: photographers who hike, travel long days, or carry multiple lenses and accessories.
Shoulder & Messenger Bags: Style Meets Storytelling
There’s something classic about a shoulder bag — maybe it’s the nostalgia of photojournalists from decades past, camera slung casually at their side. I’ll admit, I love my Overwerth leather bag for short outings or city shooting days. It’s elegant, quick to open, and looks great in photos (because yes, I think about that).
But for all their charm, shoulder bags can become a literal pain if you’re walking miles. They’re best for lightweight gear or shorter days when you want to blend function with aesthetic.
Pros:
- Stylish and easy access
- Great for street or café photography days
- Perfect for compact setups like the Leica Q3
Cons:
- Uneven weight distribution on long walks
- Limited protection in rough weather
Ideal for: photographers who value quick access and style over heavy loadouts — or anyone planning more leisurely exploration days.
In practice: Mixing styles for flexibility
I usually bring two bags on major trips: a lightweight sling for day outings and a larger backpack for travel days or hikes. That combo gives me flexibility whether I’m photographing wildlife near Denali or wandering through small towns in Georgia.
For deeper dives into how your gear setup affects your creativity and comfort, you might enjoy Mastering Travel Photography and Practical Travel Tips for Photographers. Both expand on how your equipment choices shape your shooting rhythm on the road.
Section 5: My Favorite Camera Bags (What I Actually Use and Why)
I’m a gear-person at heart, but after years of travel I’ve learned that the “right” bag is less about brand and more about how it fits my travel style. Below are three bags I lean on—each one for a slightly different photo-trip scenario. Pick the one that matches your mood (or grab all three if you’re like me and love options).
Quick Reference Chart
| Use Case | Bag | Why I Use It | Quick Notes |
| Daily day-shoot / city stroll / quick outing | Compact Sling (for example: a lightweight sling that holds one body + one lens) Urth Dolomite Camera Sling | When I’m wandering through a historic town or exploring cafés with my Leica Q3 (or just my Fuji with one lens), this keeps me agile and light. | Pros: very light, quick access. Cons: very limited space—camera + one lens only. |
| All-day travel / hiking / multi-lens kit | Backpack style (e.g., my go-to backpack for full-day shoots) WANDRD PRVKE 31L Photo Backpack | When I’m heading out for a full day of varied shots (e.g., island trails, wildlife roadsides, multi-stop drives), this gives me room for body + two lenses + filters + water + snacks. The back-panel and padded straps make it comfortable. | Pros: plenty of space, good ergonomics. Cons: slightly heavier/bulkier than a sling, so less ideal for purely light walking. |
| Weekender / “bring everything” trip | Think Tank Retrospective Weekender Bag + inserting the Peak Design Camera Cube (Large) for organized gear protection | When I’m packing for a longer trip (think: 3-5 days, multiple lenses, laptop/tablet, maybe a tripod), I want a bag that looks good on camera, fits gear, still complies with most carry-on dimensions—and with the Cube inside I get modular, protective organisation. Having the Cube lets me drop in my camera kit as a self-contained unit inside the weekender bag. | Pros: big capacity, excellent build, flexibility with the Cube for protecting and organising gear. Cons: costlier, heavier when fully packed, more bag than you need for shorter days. |
Section 6: Final Checklist & My Packing Routine
No matter how many times I’ve packed for a trip, I still do a final “camera bag audit” before I hit the road. It’s amazing how easy it is to forget something small — like a lens cloth or memory card — that can make a big difference once you’re miles from the nearest store. Over time, I’ve built a simple ritual to make sure everything fits, works, and earns its place in the bag.
My Packing Routine
- Lay everything out.
I start by spreading my gear on a table or bed. Cameras, lenses, filters, batteries — everything visible. This gives me a quick visual of what I actually need versus what I’ve grabbed out of habit. - Edit down ruthlessly.
I ask myself, “Will I really use this?” If the answer is “maybe,” it usually stays home. My go-to setup — Leica Q3 or Fujifilm X-T5 with two lenses — covers almost every situation I’ll encounter on the road. - Pack in layers.
Heavy lenses and camera bodies near the bottom or back panel for balance, lighter accessories up top.
I also make sure cables, chargers, and cards are separated into small pouches — no tangled messes mid-trip. - Check accessibility.
I test how fast I can grab my camera and swap lenses without setting the bag down. If it takes more than a few seconds, something’s packed wrong. - Weather-proof and double-check.
I toss in a rain cover and microfiber cloth. If there’s even a chance of rain or dust, I want to be ready. - Leave a little space.
There’s always something extra on the road — a brochure, a snack, or a local souvenir that sneaks into the bag. I try never to pack my bag completely full. Flexibility is freedom.
The Quick-Grab Checklist
Essentials:
☐ Camera body (charged battery inside)
☐ Primary lens (e.g., XF 16-80 mm or Q3 fixed lens)
☐ Secondary lens or telephoto
☐ Extra batteries (fully charged)
☐ Memory cards (formatted & labeled)
☐ Lens cloth + small brush
☐ Filters (polarizer, ND, UV)
☐ Small tripod or clamp (if needed)
Support gear:
☐ Charger & cable set
☐ Power bank
☐ Cleaning wipes
☐ Notebook & pen
☐ Travel adapter
☐ Passport & ID (if flying)
☐ Snacks & water bottle
Personal add-ons:
☐ Sunglasses / hat
☐ Compact rain jacket
☐ Free space for souvenirs & snacks
In Practice: The “Night Before” Test
The night before a trip, I repack my bag, zip it, and pick it up. If it feels too heavy, I remove one thing — usually a lens I probably wouldn’t have used anyway. Then I leave it by the door, ready to roll out at sunrise.
That ritual helps me start the trip lighter, both physically and mentally. There’s something freeing about knowing every item in your bag has a purpose.
For more packing strategies, see How I Plan and Photograph the Perfect USA Road Trip and Practical Travel Tips for Photographers. Both posts expand on the same mindset: thoughtful preparation leads to creative freedom once you’re on the road. And if you prefer to pack light with just one lens, see Packing: One-Lens Travel — How to Simplify Your Photography and See More.
Explore More & Wrap-Up
After years of hauling camera gear across highways, ferry decks, and muddy trails, I’ve realized the best camera bag isn’t necessarily the one with the most features — it’s the one that disappears when you’re behind the lens. When a bag feels comfortable, keeps your camera ready, and holds exactly what you need (nothing more, nothing less), it becomes part of the journey rather than a distraction from it.
Every scratch, scuff, and bit of dust tells a story. My Think Tank Weekender still carries a faint trace of Kauai’s red clay; my sling bag once doubled as a pillow on an early ferry from Whittier to Valdez. These details remind me that the right gear isn’t about perfection — it’s about dependability.
So, whether you’re heading off for a weekend drive along the Blue Ridge Parkway or setting out on a month-long road trip across the U.S., take a moment to choose the bag that fits your rhythm of travel. Because when your gear is organized and your shoulders aren’t screaming by midday, you’ll have more energy left for what really matters — creating.
Explore More from the Road
How I Plan and Photograph the Perfect USA Road Trip
Learn how I balance planning and spontaneity, with a strategy that keeps both my routes and my camera gear flexible.
Practical Travel Tips for Photographers
Simple, road-tested ideas for staying organized, efficient, and inspired while shooting on the go.
Mastering Travel Photography
My cornerstone guide on combining storytelling, light, and gear — from composition to creative vision.
Leica Q3 (43mm) Review: Why This Version Fits My Travel Photography Even Better
I recently upgraded to the 43mm version of the Leica Q3, and it fits my travel photography even better. You can read my full review here.
Prime vs. Zooms: Finding the Right Lens for the Way You Travel. Read how I choose whether to use and prime lens vs. a zoom lens and why.
Final Thoughts
The perfect camera bag doesn’t just protect your equipment — it supports your way of seeing. It helps you travel lighter, focus longer, and find beauty in the moments between destinations. Whether you’re using a compact sling, a reliable backpack, or that Think Tank Weekender with a Peak Design cube neatly tucked inside, remember this: your best bag is the one that lets you forget it’s even there.
✦ Love travel & photography?
Join my newsletter. You’ll get monthly tips, behind-the-scenes stories, and gear talk from the road — delivered right to your inbox.