When I first started photographing my travels, I thought the secret was in the gear. A better camera, a sharper lens, maybe one of those fancy backpacks that make you look like you know what you’re doing. But the truth? Travel photography is more about how you see the world than what you carry in your bag. This post, Mastering Travel Photography for Beginners, is part of my Mastering Travel Photography series — a practical guide for anyone who loves capturing the world through the lens.
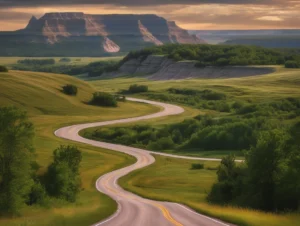
Whether you’re setting out on your first big road trip or planning a once-in-a-lifetime adventure abroad, learning to capture the places you visit isn’t just about taking pictures — it’s about telling stories. It’s about remembering how the light fell across an empty highway, how a town felt just before sunset, and how it all comes rushing back when you look through your photos later.
In this post, I’ll walk you through the basics — from choosing your camera and understanding light to composing shots on the go. Think of it as a friendly travel companion who’s learned a few lessons (and made a few mistakes) along the way.
Choosing Your Gear: A Beginner’s Guide to Travel Photography
Before we go any further — let’s make one thing clear. This is a beginner’s gear guide. If you’re already a professional or a seasoned photographer who can tell the difference between sensor noise patterns at ISO 6400, you probably already have your system dialed in. But if you’re just starting out, or you’re looking to level up from your smartphone, this section is for you.
As a beginner, your goal isn’t to own every piece of equipment — it’s to understand what matters most for how and where you travel. Lightweight, versatile, and intuitive gear will always beat heavy, complex setups that keep you fumbling through menus while the light disappears.
Understanding Sensor Types: APS-C vs. Full Frame vs. Micro Four Thirds
One of the first decisions you’ll face is sensor size — which affects image quality, field of view, and the size of your gear. Here’s a simple breakdown:
- APS-C (Crop Sensor)
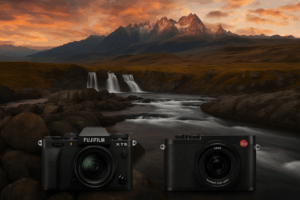
The most common format for beginners. APS-C sensors strike a great balance between quality, size, and price. Cameras like the Fuji X-T5, Canon R100, or Sony a6400 fall into this range. They’re light, travel-friendly, and still deliver beautiful, sharp images — perfect for road trips or hiking with a small pack. - Full Frame
These are the big sensors used by many professionals. They offer exceptional image quality, better low-light performance, and more depth of field control — but at a cost. Full-frame cameras are heavier, pricier, and less forgiving when you’re still learning exposure and composition. They shine once you’ve built confidence and want that next level of quality, but beginners may find them cumbersome. - Micro Four Thirds (MFT)
Think of these as the compact travelers’ dream. Cameras from Olympus or Panasonic often use this smaller sensor. You’ll trade a bit of image quality for lighter weight, smaller lenses, and incredible portability — perfect if you want a setup that fits easily in a sling bag without sacrificing manual controls.
Each system has its fans, but the best one for you depends on your priorities:
- If you want a mix of quality and portability, go APS-C.
- If you’re all about image perfection and willing to carry the weight, go full frame.
- If you’re constantly on the move and love minimalism, try Micro Four Thirds.
Essential Travel Photography Gear Checklist for Beginners
You don’t need a suitcase full of lenses or a camera bag that weighs more than your carry-on. When you’re starting out, it’s all about keeping things simple, light, and reliable. The goal is to build a setup that lets you focus on your photography — not your gear.
1. Camera Body
If you read the previous section, you already know there’s no single “right” camera. For beginners, mirrorless cameras have become the sweet spot — lightweight, compact, and capable.
Look for a camera that feels good in your hands, has intuitive menus, and gives you manual control options for when you’re ready to grow. Don’t worry about chasing megapixels — a 24MP sensor is plenty for travel photography.
👉 Recommended starting point:
- Mirrorless APS-C camera like the Fuji X-T30 II, Sony a6400, or Canon R10.
- If you want smaller, consider Micro Four Thirds cameras like the Olympus OM-5.
2. Lenses
Your lens choice matters more than your camera body. Start with a versatile zoom lens — something that covers wide-angle for landscapes and moderate telephoto for details.
- Standard Zoom (kit lens): Great all-around option for everyday shooting.
- Wide-Angle Lens (16–35mm range): Perfect for landscapes, architecture, and big scenic views.
- Telephoto Lens (70–300mm range): Helps you isolate details, compress scenes, and capture wildlife from a distance.
👉 Pro tip: Don’t rush to buy multiple lenses. Learn your kit lens inside out first. Once you start seeing its limitations, you’ll know what you actually need next.
3. Tripod
A sturdy, lightweight tripod is one of the most underrated tools for travel photographers. It’s your best friend for sunrise landscapes, long exposures, or shooting waterfalls.
Look for:
- Carbon fiber or aluminum (lightweight yet sturdy)
- Compact folding size (fits in your carry-on or strapped to your backpack)
- Quick release plate system for convenience
If space is tight, a mini travel tripod or even a GorillaPod can get you started.
4. Memory Cards & Batteries
You’ll never regret packing extras of both. Travel photography means long days without power outlets — and running out of space or juice mid-adventure is heartbreaking.
- Use two or more high-speed cards (V60 or V90 for 4K video or burst shooting).
- Carry at least two spare batteries, especially if you shoot mirrorless (they use more power than DSLRs).
5. Camera Bag or Sling
Find a bag that’s comfortable, weather-resistant, and quick to access. A good bag doesn’t just protect your gear — it keeps you shooting efficiently when that perfect light hits.
Look for:
- Side or top access for quick lens swaps
- Rain cover or water-resistant zippers
- Enough padding but not bulk
- Space for your essentials (snacks count as essentials)
6. Cleaning & Protection
Dust, rain, and sea spray happen — especially when you’re exploring back roads or coastal areas.
- Microfiber cloths
- Lens wipes
- Rocket blower
- Lens filter (UV or clear) for protection
7. Nice-to-Have Extras
Once you’ve got the basics down, consider adding:
- Polarizing filter – deepens skies, cuts reflections on water.
- ND filter – for silky-smooth waterfalls or long exposures.
- Compact rain cover – a lifesaver in unpredictable weather.
- Portable SSD or backup drive – peace of mind for your images.
For a deeper look at my travel kit and the gear that works best on the road, check out my Travel Photography Gear Guide.
Learning to See: Developing a Photographer’s Eye
Here’s the truth that surprises most beginners — great photography isn’t about having the best camera. It’s about learning to see the world differently. The camera is just your paintbrush. It can’t make you an artist any more than a fancy brush can make someone a painter. The skill comes from how you use it — how you notice light, color, and emotion in the world around you.
When you’re traveling, it’s easy to get caught up snapping everything in sight — the famous viewpoint, the food, the cute street dog, the same sunset everyone else is watching through their screen. But slowing down and learning to see like a photographer changes everything.
Look for Light, Not Just Landmarks
Light is what makes a photograph come alive. It shapes the scene, creates depth, and tells your story. Watch how light moves across a landscape — morning light is soft and golden, midday light is harsh and flat, and evening light adds warmth and emotion.
If you visit a place and the light isn’t right, don’t force it. Take a mental note and return later. Some of my best shots happened simply because I waited for the light to change.
👉 Read next: Understanding Light in Landscape Photography — for a deeper dive into using natural light on the road.
Slow Down and Observe
It’s easy to rush from one spot to the next, but photography rewards patience. Before you raise your camera, take a moment to look around. Notice colors, shadows, reflections, and leading lines.
Try this: Before you take any photo, spend 30 seconds looking for what really caught your attention — the texture of an old door, the curve of a road, the way light hits a building. Then build your shot around that. Learning patience early on pays off later in the field — my post The Art of Patience in Wildlife Photography dives deeper into that idea
Compose With Intention
Composition isn’t just about rules — it’s about storytelling. Sure, you’ll hear about the “Rule of Thirds,” “Leading Lines,” and “Framing,” but these are just starting points.
Ask yourself:
- What do I want people to feel when they see this photo?
- What’s the story I’m telling about this place?
- What’s the simplest way to say it?
Once you’ve nailed the basics, play with breaking the rules. Tilt your frame, shoot through windows, use reflections, or step back and let negative space do the talking.
👉 Read next: Mastering the Art of Composition on the Road — where I dig into how to use storytelling to guide your compositions.
Move Around — Literally
One of the best pieces of advice I can give: don’t take your first photo from where you first stood. Walk around your subject. Kneel down, climb higher, change your angle.
A tiny shift in perspective can turn an ordinary shot into something special. Sometimes, I’ll circle a scene like a curious tourist before finding the perfect composition. (And yes, I’ve gotten strange looks for lying on sidewalks — totally worth it.)
Practice Every Chance You Get
You don’t need to travel halfway across the country to practice travel photography. Try photographing your own town — the morning light on your street, reflections in puddles, or a local market. The more you practice seeing light and composition, the easier it becomes when you’re on the road.
👉 Read next: Travel Photography Tips for Beginners (this post!) and Shooting RAW + JPEG on the Road — both are great for learning workflow and developing your eye.
Building Confidence and Finding Your Style
Every photographer — beginner or pro — starts in the same place: uncertain, inconsistent, and comparing their work to everyone else’s. It’s normal. You might scroll through Instagram and think, “How did they make that look so effortless?”But here’s the truth — confidence in photography doesn’t come from owning better gear or knowing every setting by heart. It comes from experience, from practice, and from trusting your own eye.
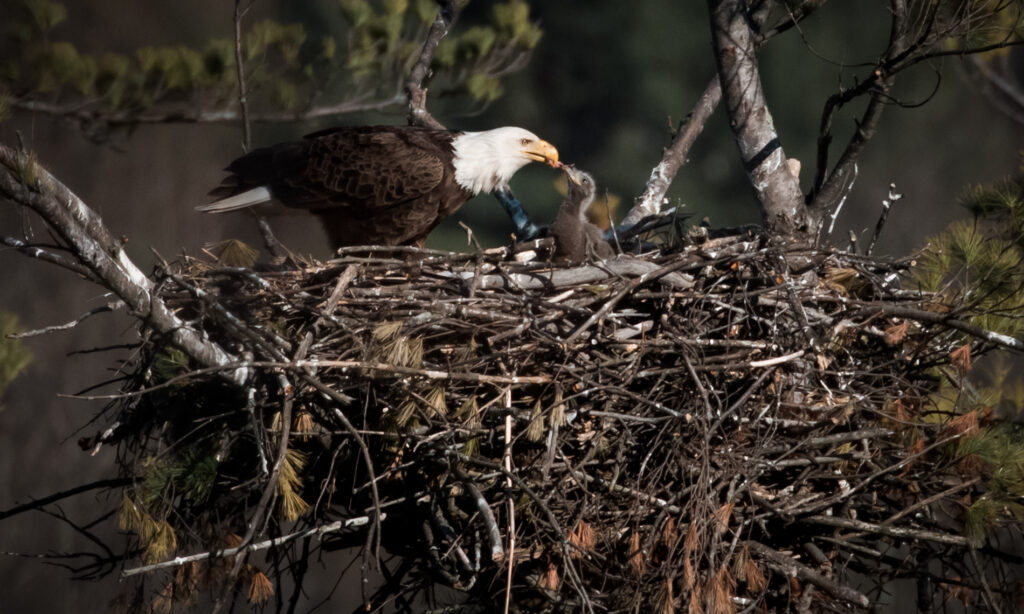
Think of it like learning to play an instrument. At first, every photo feels like a test — “Did I get it right?” But over time, the technical stuff becomes muscle memory. Then you start to feel the rhythm of light and composition instead of overthinking it. That’s when your personal style begins to emerge. When you start trusting your instincts, you’ll find your rhythm — like I did while photographing eagles on the riverbank.
Don’t Compare Your Beginning to Someone Else’s Middle
It’s easy to get discouraged when you’re surrounded by polished, curated images online. But remember — you’re seeing someone’s highlight reel, not the hundreds of photos that didn’t make the cut. Every photographer has bad days and missed shots (I have plenty of both).
Instead of comparing, study the photos you admire. Ask yourself why they work — is it the light, the composition, the mood? Then use that as inspiration, not competition.
Photograph What You Connect With
Your style grows out of what you love. Maybe it’s quiet backroads, coastal sunsets, or the way morning fog rolls through the trees. The more you photograph what genuinely draws you in, the more authentic your images become.
Don’t chase trends. A thousand people might photograph the same waterfall, but none of them will see it quite like you do. Lean into that uniqueness — it’s what makes your work yours.
Embrace the “Misses”
Not every shot will be portfolio-worthy — and that’s a good thing. The more photos you take, the more you’ll learn what works (and what doesn’t). Mistakes are how you refine your instincts.
One of the best exercises? After a day of shooting, go through your photos and pick your top three. Ask yourself why you like them — then compare that to the ones that didn’t work. You’ll start noticing patterns that define your emerging style.
Keep Shooting, Keep Learning
Confidence comes from doing. Take your camera everywhere. Photograph in different light, different weather, different moods. Over time, you’ll start trusting your gut more and worrying about “getting it right” less.
Photography isn’t about perfection — it’s about expression. The more you shoot, the more your style will find you, not the other way around.
👉 Read next: Mastering Travel Photography — my cornerstone guide that ties together gear, light, composition, and storytelling.
Practical Shooting Tips for the Road
Here’s the thing about travel photography — it rarely happens in ideal conditions. You’ll find yourself shooting out a car window, balancing on uneven rocks, or trying to frame a shot before the tour bus pulls in. The trick isn’t to wait for perfect conditions — it’s to learn how to make the most of real-world ones.
1. Work With the Light You Have
Sure, golden hour is magical, but you won’t always be there at sunrise or sunset. When you’re traveling, you often have one shot to get the photo — even if it’s midday and the sun feels like it’s personally offended you.
Use shadows creatively. Find side light that adds shape, or look for reflected light bouncing off buildings or water. If the light is too harsh, switch to shooting details, textures, or people instead of sweeping landscapes.
👉 Read next: Understanding Light in Landscape Photography — I break down how to work with light in every condition (even the dreaded noon sun).
2. Take the “Guaranteed Shot,” Then Experiment
When you arrive at a spot, take the obvious photo first — the safe one that checks the box. Then slow down. Try a different perspective. Move higher or lower. Look back in the opposite direction.
I call this the “Shoot, then refine” method. Sometimes the first frame ends up being the keeper, but often the magic comes from the shots you take after the obvious one.
3. Don’t Let Motion Stop You
Some of my favorite photos were taken right out the car window — safely, of course (passenger seat only!). If you’re on the move, keep your camera within easy reach. Travel moments disappear fast — clouds, wildlife, or roadside barns that look like they’ve seen a century.
Pro tip: Keep your settings ready for “grab-and-go” shots — something like aperture priority, auto ISO, and a fast shutter speed. That way you can react, not fumble with dials.
4. Keep Your Gear Accessible, Not Packed Away
If your camera’s buried under snacks, jackets, and road maps, you’ll never use it. Keep it in a spot where you can grab it fast — sling bag on the seat next to you, or hanging by a wrist strap when walking through a town.
I use a small mirrorless setup for this exact reason — less gear equals more photos.
5. Shoot Through the Weather
Rain, fog, and even snow add mood and texture to your photos. Don’t pack up your camera just because the weather turns — some of the most atmospheric shots happen when everyone else runs for cover.
Use a lens hood or small towel to keep droplets off, and embrace the reflections, mist, and diffused light that come with storms. Glacier photography can be tricky — I talk about it more in my post on Hubbard Glacier, Alaska, where light and reflection play major roles.
6. Tell the Story of the Place
Don’t just photograph what you see — capture how it felt to be there. Include small details: the local diner sign, the road winding into the mountains, the view in your side mirror. Those little moments often tell the bigger story.
7. Back Up as You Go
It’s not glamorous, but it’s essential. Use dual card slots if your camera has them, or back up each night to a portable drive or cloud storage. You’ll thank yourself when that once-in-a-lifetime photo isn’t lost to a corrupted card or accidental delete.
Travel photography isn’t about chasing perfection — it’s about capturing presence. The joy of being somewhere new, the adventure of not knowing what’s around the next bend, and the small details that make the memory yours.
👉 Related reads:
- Shooting RAW + JPEG on the Road
- Mastering the Art of Composition on the Road
- Travel Photography Gear Guide
Wrapping Up: Every Journey Starts with One Click
Travel photography isn’t just about making pretty pictures — it’s about noticing the world. It’s about seeing how the light changes across a mountain range, how a small town wakes up in the morning, or how a quiet backroad feels when you have it all to yourself. Once you’re comfortable with the basics of composition and camera settings, the next step is learning how to bring your travels to life through story. Mastering Storytelling on the Road is a great place to start.
If you’re just beginning your photography journey, don’t worry about having all the gear or getting every setting perfect. What matters most is showing up with curiosity. Keep your camera close, keep your eyes open, and let your sense of wonder do the rest.
Every time you press the shutter, you’re not just taking a photo — you’re capturing a memory. Over time, those small moments will tell the bigger story of your adventures. If you’re looking for places to put your new photography skills to the test, explore my Off the Beaten Path Destinations series.”
🌍 Explore by Region
Discover the landscapes, small towns, and scenic drives that make each corner of the country unique.
- 🏔️ Alaska Region Travel Guides – Wild landscapes, glaciers, and unforgettable wildlife.
- 🌺 Hawaii Region Travel Guides – Island adventures across Oʻahu, Maui, Kauaʻi, and the Big Island.
- 🌲 Northwest Travel Guides – Evergreen forests, coastal highways, and hidden waterfalls.
- 🏜️ Southwest Travel Guides – Desert light, red rock canyons, and timeless back roads.
- 🌄 Appalachian Region Travel Guides – Mountain fog, winding parkways, and small-town charm.
- 🌻 Midwest Travel Guides – Quiet beauty, open skies, and the heart of small-town America.
- 🌾 Southeast Travel Guides – Covered bridges, coastal byways, and southern hospitality.
- 🍁 Northeast Travel Guides – Fall colors, rugged coastlines, and storybook towns.
📸 Explore by Theme
Dive deeper into the kind of travel that inspires you most.
- Regional Back Roads and Byways – Hidden gems and quiet corners off the main map.
- Epic Road Trips – Month-long journeys that change how you see the road.
- Practical Travel Tips for Photographers – Smart advice for staying prepared and creative on the move.
- Safety, Ethics, and Respectful Travel – Traveling with awareness and appreciation for every place you visit.
- My First 30-Day Road Trip – The adventure that started it all.
- Scenic Drives and Road Trips – From epic cross-country routes to forgotten byways.
- Travel and Photography Tips: Balancing the Journey
Join the Journey
If you enjoyed this guide, stick around — I share practical photography tips, behind-the-lens stories, and new travel guides in my newsletter. It’s where I talk about the lessons learned (and the mishaps survived) while chasing light on the back roads of America.
👉 Subscribe to the Back Roads Lens newsletter and come along for the ride.
📸 Continue Your Journey
Love learning on the road? Explore the full Mastering Travel Photography series — where I share the techniques, tools, and mindset that shape every photo I take.
- Mastering Travel Photography: Tips and Tutorial for Capturing the Road Less Traveled
- Mastering the Art of Composition on the Road
- Mastering Light in Landscape Photography
- Mastering Storytelling on the Road
- Mastering RAW + JPEG Shooting on the Road
- Mastering the Art of Patience in Wildlife Photography
- Mastering Shooting in Low Light
- Mastering the Art of Wildlife Photography
- Mastering The Art of Mindful Photography
- Mastering Using Reflections in Travel Photography
- Mastering the Histogram: A Simple Guide to Better Exposure
Each post is part of a creative roadmap designed to help you see the world — and your photography — in a new light.