Discovering the Art of Seeing Through the Lens
There’s something endlessly inspiring about travel photography. It’s not just about collecting pretty pictures—it’s about learning to see. Every journey, whether a 30-day cross-country road trip or an afternoon walk along a familiar trail, offers stories waiting quietly for those who notice the details. Mastering travel photography is not difficult!
When I first picked up a camera, I didn’t set out to become a travel photographer. I simply wanted to remember what it felt like to stand in a place that took my breath away—the smell of pine, the hum of a distant highway, the way light shifted through the clouds. Over time, that curiosity became my compass. Now, every road trip, every detour, and every photograph is part of how I understand the world. This is part of the series, “How I Find Off The Beaten Path Destinations”. If you love pairing photography with open-road adventure, my cornerstone post on Scenic Drives and Road Trips Across America gathers some of my favorite routes to explore.
Why Mastering Travel Photography Is More Than Technical Skill
Mastering travel photography isn’t about expensive gear or exotic destinations. It’s about connection: between you and the landscape, the camera and the story, the image and the emotion it carries. Creativity on the road isn’t just about finding beauty — it’s about learning to share it. Once you start noticing the stories behind each scene, you’re on your way to Mastering Storytelling on the Road. You can also capture authentic local scenes and storytelling in local eateries like Keneke’s Grill.
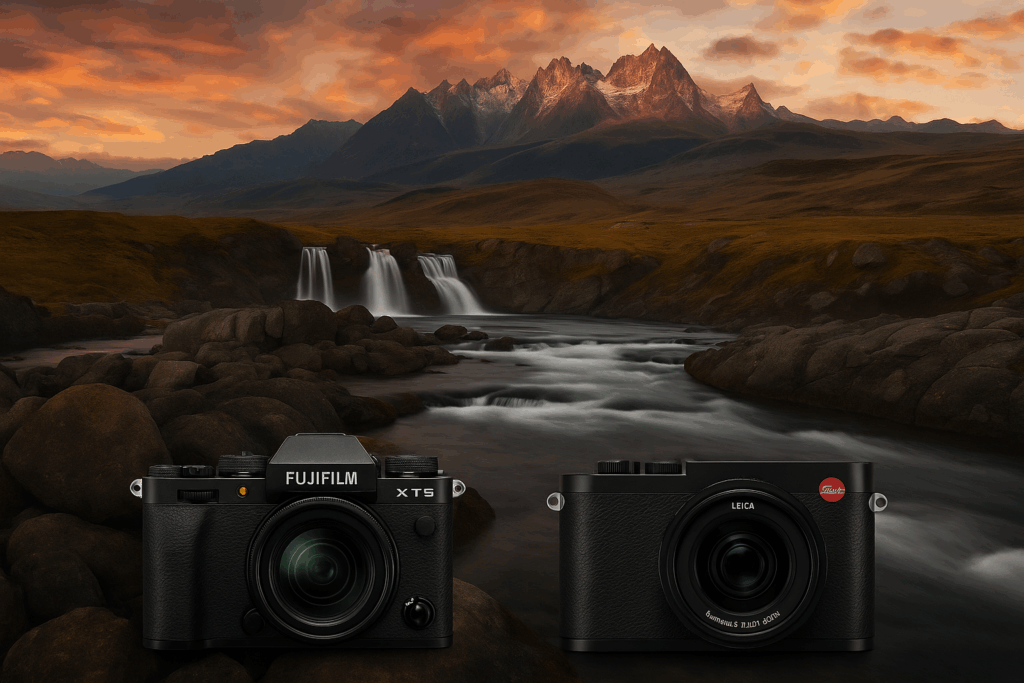
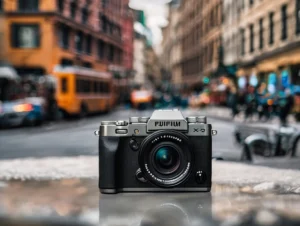
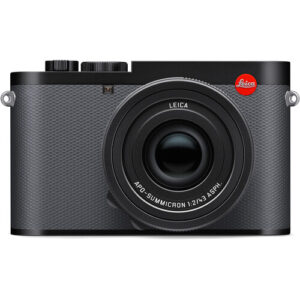
Through years of exploring America’s backroads with my Leica Q3 and Fujifilm X-T5, I’ve learned that great photos are built on awareness, patience, and curiosity about what’s around the next bend.
If you’re just starting your photography journey, my post Back Roads Lens: How I Find Off-the-Beaten-Path Destinations in the USA dives deeper into how to slow down, explore intentionally, and find the hidden beauty that makes travel photography so rewarding.
What This Guide Will Teach You
In this guide, I’ll share the lessons that shaped my approach to travel photography:
- How to choose travel-ready gear that fits your style and story
- How to master exposure, composition, and light in any environment
- How to edit photos without losing the natural mood of the scene
- How to tell authentic stories through your images
Each section will link to hands-on tutorials, travel gear breakdowns, and region-specific guides to help you grow as both a traveler and photographer.
For an overview of my travel setup and essential equipment, visit my post Travel Photography Gear Guide: Cameras, Lenses, and Accessories and Best All-Purpose Travel Lenses.
If you’re interested in practical lessons from the road, you might also enjoy my full-length feature, 30-Day USA Road Trip Guide, where I share photography planning, road-tested gear tips, and on-the-go shooting routines. And If you’re just getting started, read Travel Photography for Beginners — it’s a friendly step-by-step introduction to building your skills on the road.”
Capturing the Road Less Traveled
Whether you’re photographing wide-open landscapes or wildlife close to home, mastering travel photography begins with observation. It’s about pausing long enough to see light, texture, and emotion—then letting your camera translate what words cannot.
I hope this cornerstone becomes your roadmap for growth and inspiration—helping you transform the simple act of taking a photo into a way of experiencing the world.
(Related reading: Finding the Wild Close to Home – how local photography can strengthen your skills and appreciation for everyday beauty.)
Understanding the Heart of Travel Photography
Why Great Travel Photography Starts with Observation
Before you learn camera settings or lighting tricks, you have to learn to see. The best travel photography begins with curiosity—an urge to notice what most people overlook. A shadow across a canyon wall. The way fog settles between pine trees. The reflection of color in a puddle after rain.
Travel photography isn’t only about where you go. It’s about how you look. Whether I’m wandering through a small Wyoming town or watching the light shift over Oregon’s Trillium Lake, the goal is to be fully present. That moment of awareness is what transforms an ordinary scene into a story worth remembering.

Finding Stillness in a Moving World
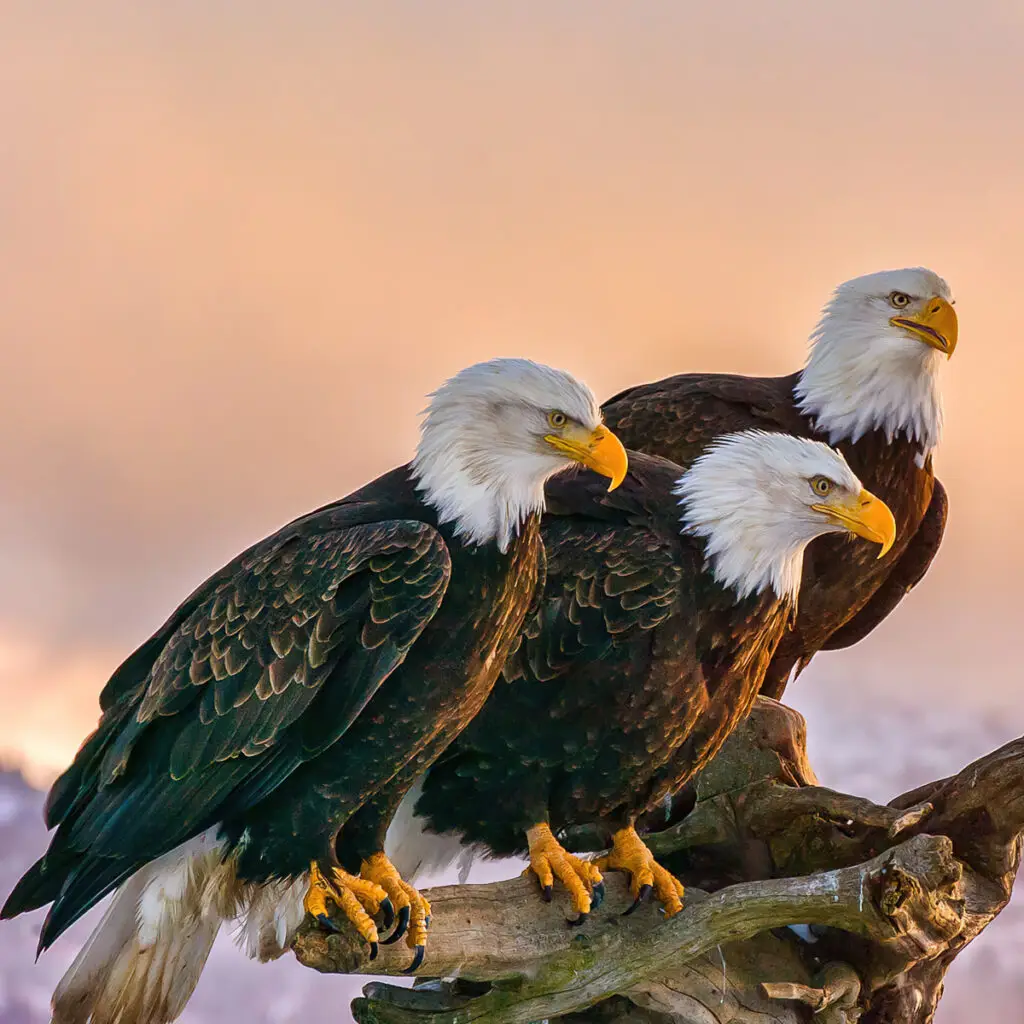
We live in a world that moves fast—scrolling, posting, rushing to the next destination. But photography teaches you to pause. I’ve spent hours waiting for bald eagles to return to their favorite river perch, watching light crawl slowly across the water. One of the most valuable habits is learning to wait — see The Art of Patience in Wildlife Photography for a deeper dive into the mindset of waiting well.”
Those quiet pauses are where the real magic happens. When you wait, you see differently. You start to notice textures, patterns, and emotions that make your work feel alive. In Finding the Wild Close to Home, I wrote about how photographing bald eagles near my local river reminded me that the wild isn’t only found in faraway places—it’s often right outside your door.
Photographing Emotion, Not Just Scenes
The most powerful images don’t just show a place—they make people feel something. Before you press the shutter, ask yourself:
- What draws me to this scene?
- What emotion do I want to remember or share?
- How can I use composition, light, or focus to express it?
Emotion gives your travel photography authenticity. Whether it’s the serenity of a mountain lake or the quiet pride of a farmer in the Midwest, emotion is what connects the viewer to your experience. In my post about the Blue Ridge Parkway Road Trip Guide, for example, I focused less on the grandeur of the mountains and more on the feeling of calm that settles over the ridges at sunset.
Telling a Story Through a Series of Images
A single photograph can be beautiful—but a series tells a story. When traveling, think in sequences:
- The wide shot – the landscape that sets the scene.
- The mid shot – a person, path, or moment of connection.
- The detail shot – texture, reflection, or color that adds emotion.
This rhythm of images gives your work depth and narrative flow. I often use this approach in stories like the Blue Ridge Parkway Road Trip Guide — mixing broad views of mountain passes with close-ups of wildflowers, weathered barns, and morning fog. Those layers help transform a collection of photos into a journey the viewer can feel. Trails like the Kolekole Pass Trail are perfect examples of where story meets composition — a place that’s both beautiful and meaningful. Photographing Waimea Canyon on Kauai is an example of light, texture, and timeless color. If you’re looking to balance photography with travel itself, see Travel and Photography Tips: Balancing the Journey
If you’re looking to discover your own stories, my cornerstone post Back Roads Lens: How I Find Off-the-Beaten-Path Destinations in the USA walks through how I uncover hidden gems that tell their own quiet tales.
The Heart of Travel Photography
Ultimately, mastering travel photography is less about control and more about surrender. It’s learning to adapt—to weather, light, and unexpected detours—and to find beauty wherever the road leads.
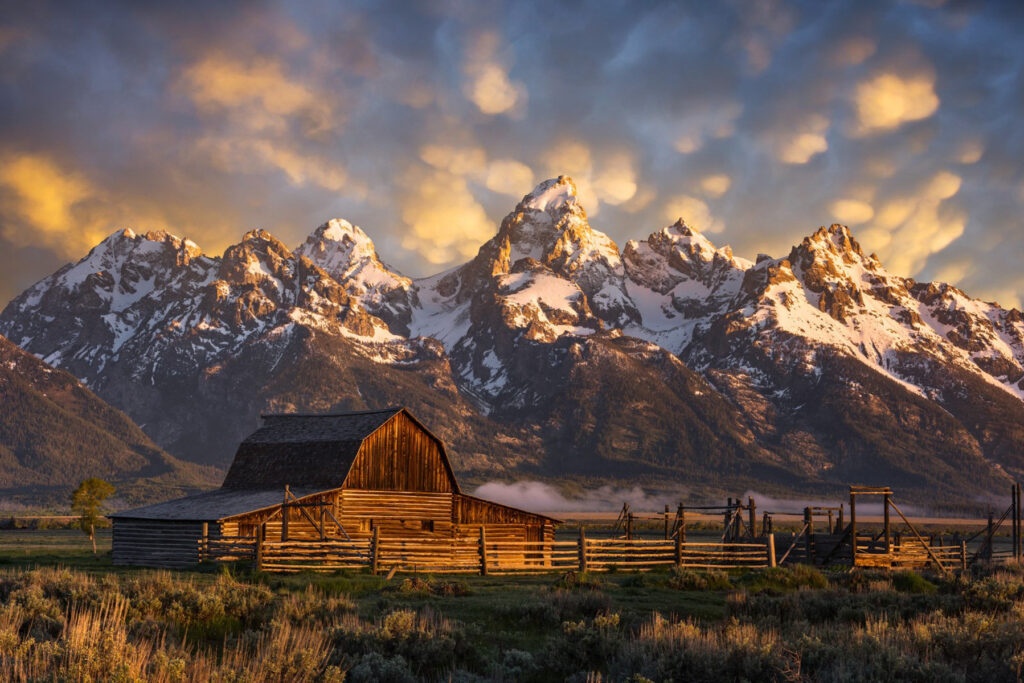
Sometimes, the best shots appear when you stop chasing them. When you let go of expectation, the world opens up in new ways. For an example of golden-hour lighting and natural framing, see my shots from Mormon Row in Grand Teton.
That’s the true heart of travel photography: not perfection, but presence.
Gear That Works for the Road
Why the Right Travel Gear Matters
Travel photography isn’t about carrying everything—it’s about carrying what helps you see clearly. The best gear supports creativity, not complexity. After years of photographing across the U.S.—from sunrise at Oregon’s Trillium Lake to the wide-open plains of the Midwest—I’ve learned that my camera bag works best when it’s light, reliable, and ready for any adventure. To simplify your travel, see Packing: One-Lens Travel — How to Simplify Your Photography and See More.
When your gear feels natural in your hands, you stop thinking about buttons and start focusing on the story in front of you. Finding a camera bag that fits your style of travel is key — I cover my top recommendations in Choosing the Right Camera Bag for the Road.
My Travel Photography Setup
I travel with two cameras that perfectly complement each other:
- Leica Q3 – My go-to for landscapes, low-light, and spontaneous moments. The fixed 28mm lens gives stunning sharpness and detail, while its compact body lets me blend into the scene. I often rely on it during long drives, sunrise shoots, or quiet town strolls.
- I recently upgraded to the 43mm version of the Leica Q3, and it fits my travel photography even better. You can read my full review here. Leica Q3 (43mm) Review: Why This Version Fits My Travel Photography Even Better
- Fujifilm X-T5 – My creative workhorse. Its interchangeable lenses, color science, and tactile dials make it perfect for adapting to anything from wildlife to wide scenic shots. The film simulations give me beautiful JPEGs straight out of camera when I want to share quickly, but I also shoot RAW for editing flexibility later.
Together, these two cameras cover nearly every travel situation—lightweight, dependable, and capable of producing professional results on the road.
For a full breakdown of how I pack and balance these cameras, check out Leica Q3 and How I Pair It with My Fujifilm X-T5 for Travel Photography and Why I Chose Leica and Fuji for Travel Photography.
My Go-To Travel Lenses
Choosing lenses for travel is all about flexibility. I want coverage for landscapes, details, and wildlife—without hauling a dozen options. My Fuji system gives me that freedom:
- XF 16-80mm f/4 – A versatile lens for everyday scenes and on-the-go shooting. Perfect for road trips where you’re constantly switching from wide landscapes to tighter frames.
- XF 70-300mm – Lightweight reach for distant wildlife, mountain ridges, or coastal scenes.
- XF 50-140mm f/2.8 – My favorite for portraits, depth, and low-light work.
- XF 35mm f/1.4 – Small, sharp, and full of character—ideal for street scenes and storytelling shots.
- XF 16-55mm f/2.8 – A classic choice when I need pro-level sharpness with weather sealing.
I go into more detail about how I use each of these lenses in my post The Best Lenses for the Fuji X-T5: My Travel Photography Go-To’s.
If you’re building your own kit, Building a Travel Photography Kit with the Fuji X-T5 walks through how to choose gear that fits your style and travel habits.
Accessories That Simplify Life on the Road
Small details make a big difference when you’re shooting in unpredictable conditions. My go-to accessories include:
- Oberwerth leather camera bags – Durable, stylish, and protective for long travel days.
- Peak Design wrist straps – Keep my cameras secure without bulk.
- Helium HE Grip (for the Leica Q3) and FUJIFILM MHG-XT5 Grip – Add comfort and stability without extra weight.
- Lexar Professional V90 and SanDisk Extreme Pro memory cards – Reliable speed and capacity for shooting in RAW.
- Medium Lowepro backpack – Perfectly sized for both cameras, essential lenses, and a day’s worth of exploring.
In my post Travel Photography Gear Guide: Cameras, Lenses, and Accessories, I share more about why I choose this specific combination for comfort, durability, and performance.
Keeping It Light and Ready
The best gear setup is one you can carry all day without fatigue. I’ve learned to edit my packing list down to essentials—because creativity thrives when you’re not weighed down.
If I can’t hike with it comfortably, it doesn’t come. Every piece of gear I carry earns its place.
(Tip: For long trips, like my 30-Day USA Road Trip Guide, I rotate lenses weekly and back up images every few days to keep things simple and organized.)
Mastering Camera Settings
Why Understanding Your Camera Settings Matters
Travel photography often unfolds fast—light shifts, weather changes, and the perfect moment rarely waits. The more fluent you are with your camera, the more easily you’ll respond to those moments without losing focus on creativity.
Mastering your camera settings isn’t about memorizing menus—it’s about instinct. When you understand how exposure, aperture, and ISO work together, your camera becomes an extension of your eye. Whether I’m shooting with the Leica Q3 or Fujifilm X-T5, knowing how light interacts with each system is what turns a good photo into one that feels alive.
For a closer look at how I pair these cameras in the field, read Leica Q3 and How I Pair It with My Fujifilm X-T5 for Travel Photography — I share exactly how and when I switch between the two based on light, landscape, and intent.
Shooting RAW + JPEG for Flexibility
When I travel, I always shoot RAW + JPEG. It gives me the best of both worlds:
- JPEGs for instant previews or quick sharing, especially using Fujifilm’s film simulations.
- RAW files for full control during editing in Lightroom once I’m home.
This combination lets me enjoy Fuji’s in-camera color and still preserve the Leica’s incredible dynamic range for later refinement. If you’re wondering whether to shoot RAW or JPEG while traveling, Shooting RAW + JPEG on the road outlines my thoughts in detail.
My favorites among Fujifilm Film Simulations are Classic Chrome for timeless tones and Velvia for vivid landscapes. I share my full approach to mixing JPEGs and RAWs in Building a Travel Photography Kit with the Fuji X-T5.
Aperture Priority: My Go-To Mode on the Road
While manual mode gives full control, Aperture Priority (A) is my most-used mode when traveling. It allows me to quickly adapt to changing light while keeping full creative control over depth of field.
For the Leica Q3
The Q3’s 28mm Summilux lens is razor-sharp and incredibly versatile. Here’s how I approach it in the field:
- f/5.6: Often the lens’s sweet spot for sharpness—two stops down from wide open. Excellent when paired with focus stacking, especially for scenes with both near and distant elements.
- f/8–f/11: My most common range for single-shot landscapes. It provides great sharpness and depth of field while keeping diffraction minimal.
- f/16: Useful for extremely bright light or when I need everything from foreground to horizon in focus, though I watch for a bit of softness from diffraction.
- f/2.8–f/4: Ideal for isolating a foreground element, shooting in low light, or adding a touch of subject separation—less for sweeping landscapes, but wonderful for storytelling.
Because the Leica’s sensor handles detail beautifully, I sometimes shoot at f/5.6 and use focus stacking later for incredible depth and clarity.
Pro tip: Test your Q3 lens at multiple apertures to find your personal “sweet spot.” Each copy performs slightly differently. And when you’re using f/8 or narrower, a tripod helps lock in sharpness—especially when shooting at slower shutter speeds during golden hour.
For the Fujifilm X-T5
With interchangeable lenses, I adapt depending on the story I’m telling:
- f/8: My go-to for wide landscapes.
- f/2.8–f/4: Ideal for portraits, details, or isolating a subject.
- f/5.6: A balanced setting for quick shooting while maintaining sharpness.
This hybrid approach lets me respond quickly on the road—staying creative without overthinking the technical side.
Embracing ISO and Low Light
Low light isn’t a challenge—it’s an opportunity for mood. Whether I’m capturing a small-town street after sunset or reflections along a quiet river, I raise ISO confidently.
- Leica Q3: Clean and rich even at ISO 3200. It handles subtle tones beautifully in twilight or golden-hour transitions.
- Fujifilm X-T5: Excellent through ISO 1600, with film simulations like Classic Chrome adding warmth to shadows.
Some of my favorite twilight shots—like the bald eagles in Finding the Wild Close to Home — were captured when I stopped worrying about noise and started chasing emotion. For a real world challenge in photographing low light and motion, see my experience at Eternal Flame Falls in Orchard Park, NY.

Manual Focus for Sharp Landscapes
Even with great autofocus systems, manual focus still has its place. I use it often for landscapes and reflections where precision matters. Both the Q3 and X-T5 offer focus peaking and magnified live view, making it easy to ensure every element is crisp.
If you’re shooting still scenes—mountain lakes, canyons, or desert plateaus—try manual focus. It slows you down, keeps you intentional, and deepens your connection to the scene.
You can see an example in Trillium Lake Oregon: A Hidden Gem at the Base of Mount Hood, where I manually focused across reflections to balance the trees, lake, and mountain all in perfect alignment.
Practice, Then Trust Your Instincts
Every photographer has a learning curve. At first, you’ll think through every setting. Then, gradually, it becomes muscle memory. Eventually, you stop worrying about whether your aperture is f/8 or f/11—you just feel what works.
By the time I’m on the road, I’m not thinking about numbers. I’m responding to the light. That’s the moment when technical skill gives way to creative flow—and that’s when the best images happen.
Light, Composition, and Timing
Learning to See the Light
Light is the soul of travel photography. It shapes every scene, transforms color, and defines mood. I’ve learned that great photos rarely depend on the camera—they depend on the light you choose to stand in.
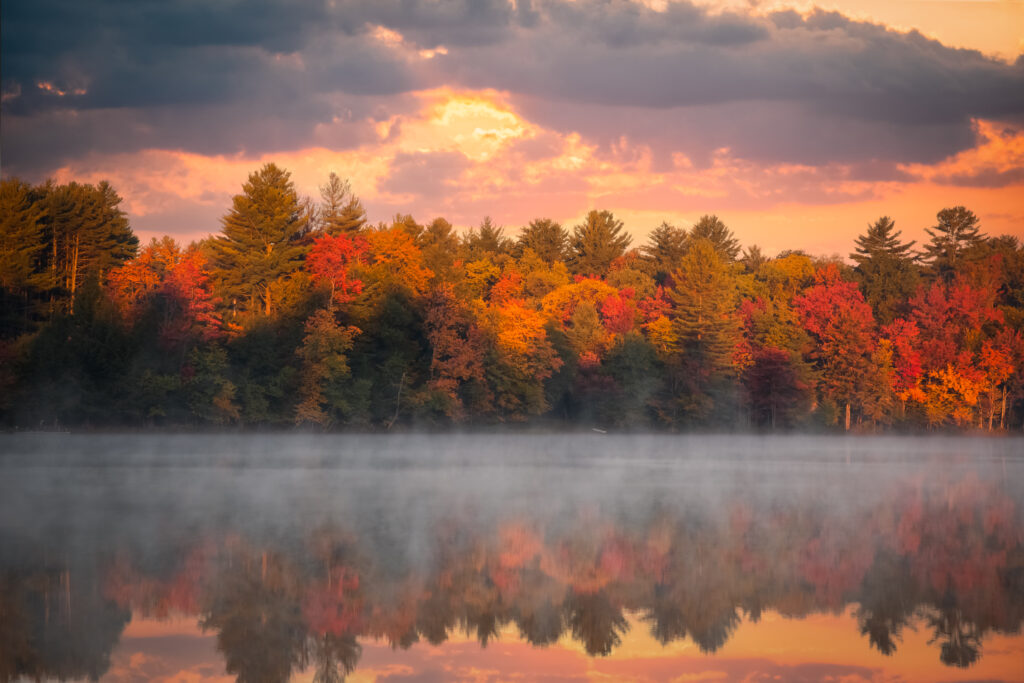
Early and late hours—the golden hours—are often the most rewarding. The light is soft, shadows are gentle, and colors feel alive. But don’t overlook cloudy days or fog. Overcast skies create natural diffusers, perfect for forest trails, waterfalls, and quiet reflections.
At Oregon’s Trillium Lake, my favorite photographs weren’t taken at sunrise or sunset—they were made in soft morning mist, when Mount Hood’s reflection looked like watercolor. Learning to read and work with that kind of light is what separates snapshots from stories.
Shooting in Broad Daylight: Making Harsh Light Work for You
In travel photography, you don’t always get the luxury of perfect light. Sometimes you arrive at a destination at noon, the sky is cloudless, and the sun is blazing overhead. While it’s tempting to pack up your gear and wait for sunset, broad daylight has its own kind of beauty—if you know how to use it.
Here’s how I handle bright midday conditions:
1. Work with shadows, not against them.
Harsh light creates deep, defined shadows—use them as compositional elements. In small towns or historic areas, I love photographing long shadows from awnings, fences, and signs. Those high-contrast patterns tell their own story about heat and time.
2. Seek out textures and abstracts.
When the light is too hard for portraits or wide shots, I switch to details—peeling paint, rippled water, or sunlight bouncing off metal. Harsh light brings out textures that softer light hides.
3. Use a polarizing filter.
It reduces glare, deepens skies, and makes colors pop—especially when photographing water or landscapes. A polarizer is one of my must-have accessories (it’s always in my Travel Photography Gear Guide.
4. Expose for the highlights.
In bright conditions, it’s easy to blow out your whites. I slightly underexpose by about –0.3 to –0.7 EV to preserve highlight detail. You can always recover shadows later, especially when shooting RAW.
5. Find natural diffusers.
Step into shade, use the edge of a building, or shoot through foliage to soften direct light. These subtle shifts can completely change the mood of your image.
6. Embrace the story of the light itself.
Sometimes, the intensity of midday light is the story. In the desert, along beaches, or in small Western towns, that harsh brightness captures authenticity. I often remind myself: not every image needs to be soft—some scenes deserve to feel raw and sunlit.
If you look through my 30-Day USA Road Trip Guide, you’ll find plenty of examples where I shot mid-afternoon light. Rather than avoiding it, I used it to show the dry heat of Nevada highways or the stark brilliance of Utah’s red rock canyons.
Using Direction and Quality of Light
The way light falls matters as much as its intensity.
- Front light reveals color and clarity—ideal for bright, clean landscapes.
- Side light adds texture and depth, giving your scene dimension.
- Backlight brings atmosphere, especially through leaves, fog, or dust.
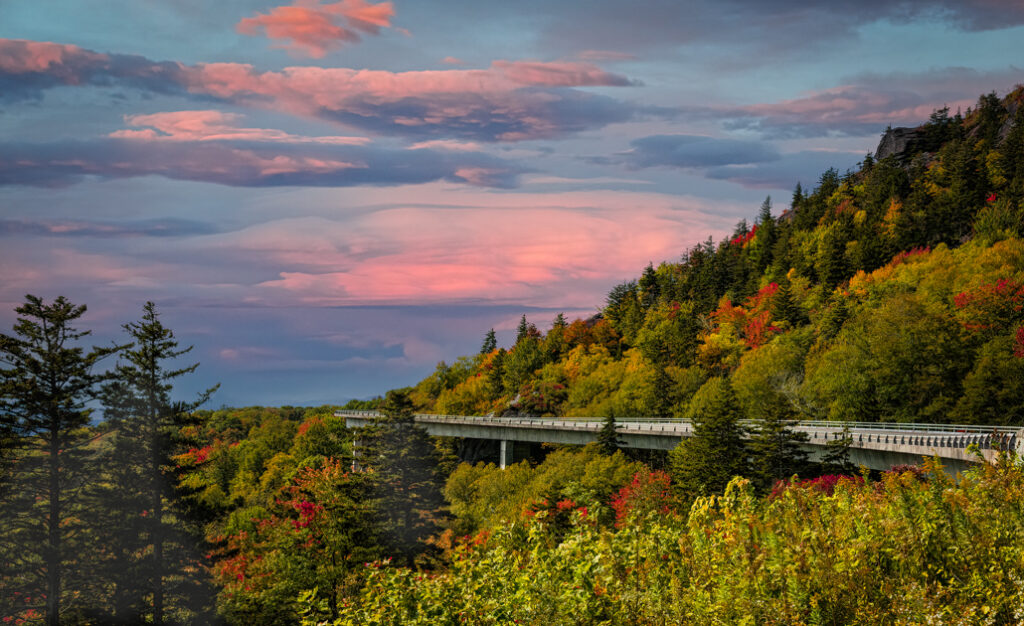
When driving scenic routes like the Blue Ridge Parkway, I often stop when side light cuts across the ridges. That golden light turns simple hills into layers of shadow and warmth.
Even at midday, direction is everything—move a few feet, change your angle, and harsh light becomes sculpted light.
Composing With Intention
Composition isn’t a rulebook—it’s how you guide a viewer’s eye.
- Rule of Thirds: Place your main subject along the grid, not in the center.
- Leading Lines: Use roads, fences, or rivers to draw the viewer in.
- Foreground Interest: Add something near the lens for depth.
- Negative Space: Let simplicity tell the story.
When I photographed eagles by the river for Finding the Wild Close to Home, I used the curve of the branch as a natural frame. That small compositional choice gave the photo balance and focus—proof that great composition often comes from patience, not complexity.
Waiting for the Right Moment
Timing is everything. Sometimes it’s about catching the first light; other times it’s waiting long enough for something subtle—a ripple, a breeze, or a bird taking flight.
At Trillium Lake, I returned multiple mornings before the wind and light aligned perfectly for a still reflection. Those calm moments are worth the wait.
Travel photography rewards patience. Sometimes, the best shot happens just after everyone else has put their camera away.
Combining Light, Composition, and Story
When light, composition, and timing align, it feels effortless. The photograph tells you what it needs—you just listen.
If I see a stretch of open road glowing in late sun or mist lifting from a forest, I don’t overthink it. I trust the instinct that says, this is the moment.
With experience, you start to anticipate those moments before they happen—and that’s when travel photography becomes more than a craft. It becomes rhythm. You can read more on Mastering the Art of Composition.
Editing Without Losing the Moment
Why Editing Should Feel Like Finishing, Not Fixing
When I sit down to edit, I don’t think about changing the photo — I think about finishing the story. Editing isn’t about perfection; it’s about preserving the mood that made me press the shutter in the first place.
I’ve learned that restraint is often the secret ingredient of great editing. Over-processing can strip away the emotion that drew you to a scene. When I look back at a photo, I want it to feel exactly like it did standing there — the warmth of desert air, the glow of sunset, or the hush of a mountain lake.
My Editing Philosophy
I use Adobe Lightroom for all my editing. It gives me full control while keeping my workflow simple. I rarely use presets or heavy filters. Instead, I focus on subtle adjustments:
- Exposure: Recover highlights and lift shadows only where needed.
- Contrast: Add just enough depth to guide the viewer’s eye.
- Color Temperature: Adjust to reflect the real tone of the light, not what looks trendy.
- Clarity and Texture: Apply gently to emphasize natural detail.
- Crop: Refine composition without changing the story.
Editing should enhance reality, not rewrite it.
Subtle Edits in Harsh Light — Canyon de Chelly
In Canyon de Chelly: Exploring Arizona’s Ancient Heart, I faced one of the toughest lighting conditions — bright midday sun bouncing off red sandstone.
The key wasn’t to fight the light but to balance it. I underexposed slightly in-camera, then used Lightroom to:
- Bring back detail in the rock highlights.
- Warm the midtones to match how the canyon walls actually glowed.
- Reduce contrast in the shadows to keep the scene natural.
The result wasn’t dramatic — it was honest. Editing allowed me to translate the light as I saw it, not how the camera’s sensor interpreted it.
Managing Bold Color and Texture — Badlands National Park
The Badlands are nature’s masterclass in color and contrast. It’s easy to go overboard in post-processing when those pastel pinks and layered ridges tempt you to push saturation.
My approach is to work with restraint:
- Start with White Balance adjustments to correct color cast.
- Slightly lift Vibrance but leave Saturation alone.
- Use Tone Curve for soft contrast instead of harsh clarity sliders.
If an edit makes the scene look like a postcard instead of a memory, I dial it back. Subtlety always wins.
Editing for Emotion — Lake Placid
In A Weekend in Lake Placid: Flowers, Reflections, and a Little Nostalgia, I leaned into emotion over precision. The morning reflections and old-town charm called for softness and warmth — an edit that felt timeless rather than clinical.
I reduced overall contrast, added a hint of haze, and shifted white balance slightly warmer to capture that nostalgic glow of late summer mornings. Every tweak was designed to protect the mood.
When your image carries emotion, gentle edits speak louder than heavy ones.
Color Consistency Across a Journey
When photographing a long trip — like my 30-Day USA Road Trip Guide — maintaining consistent color and tone across hundreds of images matters. It keeps the story cohesive.
To do that, I:
- Create a “base” edit on one photo and sync key settings (exposure, tone, color) across the series.
- Revisit highlights and shadows individually for balance.
- Use one color palette per environment — warm for desert tones, cool for mountain light, neutral for forest scenes.
Editing in series helps tell a unified story rather than a collection of disconnected moments.
A Few Editing Habits That Changed My Workflow
- Zoom out often. Don’t over-edit while pixel-peeping. Step back to see the image as a viewer would.
- Use masks for precision. Lighten only the areas that matter instead of brightening the whole scene.
- Keep before-and-after comparisons open. It’s easy to forget how beautiful the original capture already was.
- Know when to stop. If your photo starts feeling “digital,” pull back.
Building a Travel Photography Routine
Why Routine Matters for Creativity
Travel photography might look spontaneous, but the secret to staying inspired on the road is structure. A solid routine helps you focus less on logistics and more on storytelling.
When your workflow feels second nature — from packing to shooting to backing up — your energy stays where it belongs: on the experience unfolding in front of you.
Whether I’m photographing a quiet morning in Vermont or chasing afternoon light through the desert, my routine keeps me grounded, efficient, and creative no matter how far from home I am. You can read more in my post Finding Creativity in the Everyday.
Pre-Trip Preparation: Packing Light, Thinking Ahead
Before every trip, I start with a simple checklist. Staying organized means fewer distractions and more time shooting. My essentials include:
- Leica Q3 – for landscapes, reflections, and low-light work.
- Fujifilm X-T5 – for versatility, interchangeable lenses, and reach.
- Lenses: XF16–80mm f/4, XF70–300mm, XF35mm f/1.4, and XF50–140mm f/2.8.
- Accessories: Peak Design wrist strap, Overwerth leather bag, Helium HE and FUJIFILM MHG grips, Lexar and SanDisk V90 cards, and a compact tripod.
I refined this setup over time — a balance between flexibility and simplicity. I walk through the reasoning behind each piece in Travel Photography Gear Guide: Cameras, Lenses, and Accessories.
When you carry less, you see more. Traveling light forces you to move deliberately and respond to what’s actually unfolding — not what’s packed in your bag.
Establishing a Daily Rhythm
Once I’m on the road, I settle into a rhythm that keeps me consistent without feeling rigid:
Morning – I head out before sunrise. Early light is soft, quiet, and reflective — the perfect time for landscapes and lakes before wind or crowds appear.
Midday – When the sun gets harsh, I scout, drive, or photograph in strong contrast. (See my tips on Shooting in Broad Daylight.) Harsh light can be beautiful when used intentionally.
Evening – I return to favorite spots to capture golden-hour light. Returning to a scene I scouted earlier helps me see how changing light transforms the mood.
Night – I back up images, charge batteries, and review the day’s work. It’s a simple ritual that closes each day on a productive note.
On long adventures like our 30-Day USA Road Trip Guide, this rhythm helps me stay engaged without burning out.
Backing Up and Staying Organized
Losing photos once was enough for me to never take chances again. A solid backup plan gives peace of mind — especially when you’re thousands of miles from home.
Here’s my real-world workflow for mixed systems (the Leica Q3 and Fuji X-T5):
- Import every evening. I transfer all photos from both cameras to my laptop and sort them by date and location.
- Use an external SSD. This acts as my main backup drive. Each folder mirrors what’s on my laptop.
- Cloud backup when Wi-Fi allows. If I have a good connection, I upload select favorite shots to cloud storage as an extra layer of protection.
- Leica Q3’s single SD slot: Because it doesn’t offer dual-card redundancy, I rotate multiple cards instead of overwriting them. Each one becomes its own backup until I’m safely home.
- Fujifilm X-T5: I use dual-card slots set to backup mode — both cards record simultaneously.
At the end of a trip, I do one final copy to a desktop drive before formatting any cards. That habit ensures I never lose irreplaceable moments from the road.
Finding Balance Between Work and Wonder
Photography can easily become a checklist if you let it. My routine gives me just enough structure to stay organized — but plenty of space for discovery.
During our 30-Day Road Trip, many of my favorite images came from unplanned stops: a weathered barn off a backroad, a surprise rainbow over a canyon, or the glow of a diner sign in fading light.
Routine gives you reliability. Spontaneity gives you soul. The best photos happen where those two meet.
Tips for Staying Consistent on Long Trips
- Keep cameras accessible. If your gear is packed away, you’ll miss moments.
- Charge every night. Don’t risk losing morning light to a dead battery.
- Use lens wipes and microfiber cloths. Dust and sea spray are constant companions.
- Tag favorites daily. It helps later when selecting images for editing or blog posts.
- Rest your eyes. Take breaks from screens — seeing clearly depends on being present.
Learning Through Practice and Patience
The Road to Mastery Is a Long One
Travel photography has taught me that mastery doesn’t come from perfect gear or lucky light — it comes from showing up again and again.
Each time I head out with my camera, I learn something new. Sometimes it’s a technical adjustment — how light behaves off canyon walls or how a reflection sharpens when the wind pauses. Other times, it’s a reminder to slow down, breathe, and let the moment unfold naturally.
Over time, those lessons build quietly. Patience becomes habit. Observation becomes instinct.
Learning to Wait for the Moment
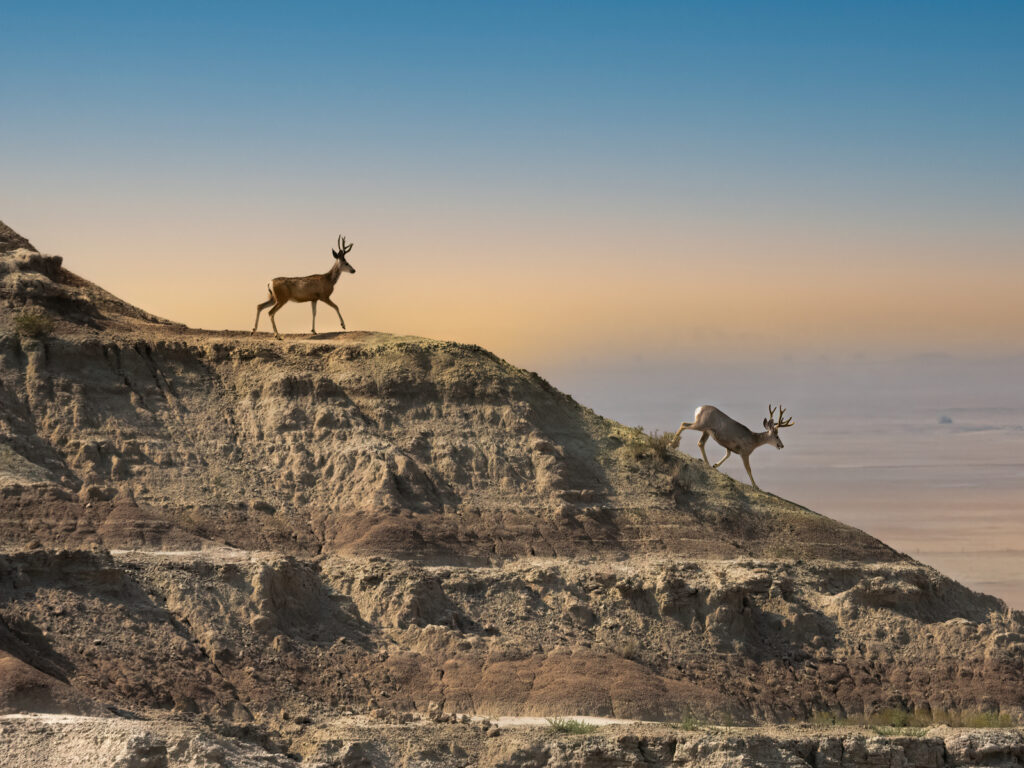
Some of the most meaningful photographs I’ve taken came only after waiting — sometimes for light, sometimes for wildlife, sometimes for stillness.
On the Blue Ridge Parkway, I’ve stood at the same overlook for an hour waiting for fog to lift. Most travelers stopped, took a picture, and drove on. But when the light finally broke through, the entire valley came alive in layers of blue and gold. That one frame told a story patience alone could capture.
In Finding the Wild Close to Home I wrote about photographing bald eagles along the river near my house — how returning day after day changed my approach. It wasn’t about chasing the perfect shot anymore; it was about understanding their rhythm and letting mine slow down to match.
Patience isn’t just a photography skill. It’s a way of seeing.
Practice Makes the Road Familiar
Every road trip, every detour, every misstep teaches something. Practice isn’t glamorous, but it’s where progress hides.
I’ve taken hundreds of photos that never make it into a post — test shots, experiments, small moments that taught me how to work with light, composition, or a new lens. Those “misses” are part of the process.
Even when the photo doesn’t work out, the act of noticing still matters. That’s how your eye improves. The more you shoot, the more natural it becomes to anticipate the image before it happens.
Practice gives you technical skill. Patience gives you timing. Together, they give you vision.
A perfect spot to practice coastal photography is Kilauea Lighthouse.
Finding Joy in Imperfection
It’s easy to believe that every photo needs to be flawless. But the truth is, imperfections tell stories too. A slightly blurred wing on an eagle in flight, a bit of lens flare over a desert road, or ripples in a reflection — these moments remind you that travel photography is real life, not a staged production.
Sometimes the “mistake” ends up being your favorite frame.
Growth Happens Between the Shots
Mastering travel photography isn’t a finish line; it’s a journey that changes with you. Each trip teaches something — about light, about place, about yourself.
The more time you spend behind the lens, the more you realize it’s not about collecting photos; it’s about deepening your awareness. You start to see patterns — how light behaves, how landscapes breathe, how emotion lives in small, quiet moments.
That’s where real progress happens: not in the perfect shot, but in the way you see. For more tips see: Practical Travel Tips for Photographers.
Next Steps: Keep Exploring and Keep Learning
The Journey Never Really Ends
Mastering travel photography isn’t about reaching a final destination. It’s a lifelong practice of noticing — of looking closer, slowing down, and finding stories hidden in plain sight.
Every road trip, every sunrise, every quiet pause with a camera in your hand teaches you something new. You learn to adapt, to wait, to see beauty where others might not stop at all.
Explore More
If you’re ready to start chasing your own version of the road less traveled, here’s where to go next. These guides and stories will help you plan your trip, inspire your photography, and remind you why the back roads always have more to say.
🌍 Explore by Region
Discover the landscapes, small towns, and scenic drives that make each corner of the country unique.
- 🏔️ Alaska Region Travel Guides – Wild landscapes, glaciers, and unforgettable wildlife.
- 🌺 Hawaii Region Travel Guides – Island adventures across Oʻahu, Maui, Kauaʻi, and the Big Island.
- 🌲 Northwest Travel Guides – Evergreen forests, coastal highways, and hidden waterfalls.
- 🏜️ Southwest Travel Guides – Desert light, red rock canyons, and timeless back roads.
- 🌄 Appalachian Region Travel Guides – Mountain fog, winding parkways, and small-town charm.
- 🌻 Midwest Travel Guides – Quiet beauty, open skies, and the heart of small-town America.
- 🌾 Southeast Travel Guides – Covered bridges, coastal byways, and southern hospitality.
- 🍁 Northeast Travel Guides – Fall colors, rugged coastlines, and storybook towns.
📸 Explore by Theme
Dive deeper into the kind of travel that inspires you most.
- 🚗 Scenic Drives and Road Trips – From epic cross-country routes to forgotten byways.
- 🏞️ Regional Back Roads and Byways – Hidden gems and quiet corners off the main map.
- 🧭 Epic Road Trips – Month-long journeys that change how you see the road.
- 🛠️ Practical Travel Tips for Photographers – Smart advice for staying prepared and creative on the move.
- 🧳 Safety, Ethics, and Respectful Travel – Traveling with awareness and appreciation for every place you visit.
✨ Explore by Inspiration
Because travel isn’t just about where you go — it’s about what it teaches you.
- Gear & Setup: Learn what I carry and why in the Travel Photography Gear Guide: Cameras, Lenses, and Accessories — from my Leica Q3 and Fuji X-T5 to the small accessories that simplify life on the road.
- Pairing Cameras: Discover how I combine the strengths of both systems in Leica Q3 and How I Pair It with My Fujifilm X-T5 for Travel Photography.
- Lens Strategy: Dive deeper into focal length choices and versatility in The Best Lenses for the Fuji X-T5: My Travel Photography Go-To’s.
- Planning Inspiration: If you’re dreaming of your own cross-country trip, my Our First 30-Day USA Road Trip: Exploring America’s Back Roads Through My Lens breaks down how I plan routes, balance photography with travel, and find the rhythm of the open road.
- Storytelling Focus: Learn how to craft emotion and narrative in Back Roads Lens: How I Find Off-the-Beaten-Path Destinations in the USA — a companion cornerstone to this guide.
- Ethics and Respect for Wildlife – Continue your photography journey in Wildlife.
- My First 30-Day Road Trip – The adventure that started it all.
- National and State Park Drive – Explore the United States National and State Park Drives
Mastering Photography Series
If you’re ready to keep building your skills, here are my other blogs in my Mastering Photography series:
- Mastering Composition on the Road – How to build stronger, more compelling images while traveling—or even in your own backyard.
- Mastering Using Reflections in Travel Photography – Transform puddles, windows, and water into storytelling tools that elevate your images.
- Mastering Travel Photography for Beginners: Learning to see the World Through Your Lens – A friendly starting point for anyone stepping into photography for the first time.
- Mastering Shooting in Low Light – Practical tips for handling tricky lighting—from dim restaurants to golden-hour mountain views.
- Mastering Light in Landscape Photography – Understand how natural light shapes your landscape images and learn to work with it, not against it.
- Mastering Storytelling on the Road: Turning Every Trip into a Captivating Travel Narrative – Capture emotion, mood, and meaning in your images—whether you’re on the road or close to home.
- Mastering The Art of Mindful Photography – Slow down, breathe, and create with clarity, intention, and a whole lot less stress.
- Mastering the Art of Wildlife Photography – From reading animal behavior to protecting highlights (and eagle feathers), this post helps you stay ready for the moment.
- Mastering the Art of Patience in Wildlife Photography – Wildlife isn’t in a hurry—so learning to slow down is half the craft.
- Mastering RAW + JPEG on the Road – Discover when shooting both RAW and JPEG helps your travel photography
- Mastering the Histogram: A Simple Guide to Better Exposure – Discover why learning to read your histogram can elevate your photography skills
- Mastering Finding Creativity in the Everyday – creativity isn’t about where you are. It’s about how you see.
Join Me:
👉 Sign up for my newsletter to get your free guide instantly — plus monthly stories, behind-the-lens insights, and new travel blog updates.