Section 1: Introduction — Embracing the Beauty of Low Light
There’s a special kind of calm that settles in when the sun dips low — that moment when colors soften, shadows stretch, and the world feels just a little quieter. Low light may seem intimidating at first, but for travel photographers, it’s one of the richest storytelling opportunities out there. This post will help you at mastering low light photography.
Some of my favorite images were made when most people had already put their cameras away: the soft glow of a lantern during a late-night wander in a small town, the warm light spilling from a café window, or the last shimmer of sunset reflecting off a riverbank near my home in Upstate New York. Low light encourages you to slow down, breathe, and really observe — the same mindset I talk about in The Art of Mindful Photography.
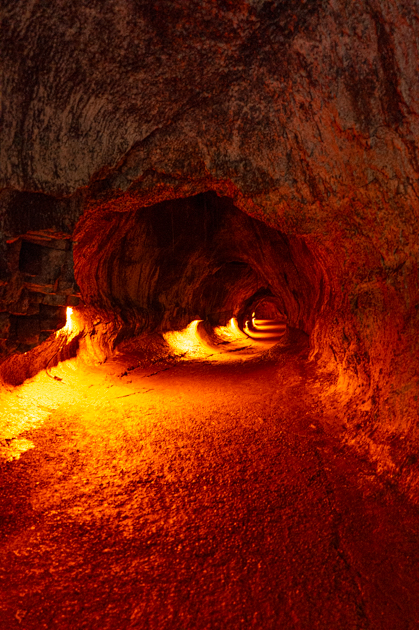
This guide will walk you through how to work with challenging light instead of fighting it. Whether you’re shooting a dimly lit sites like Thurston Lava Tube, capturing a quiet moment along the Pinellas Trail after a bike ride, or photographing wildlife just as night falls, you’ll learn how to bring out the mood, texture, and emotion that low light naturally gives us.
Section 2: Understanding the Types of Low Light
Not all low light is created equal. In fact, learning to recognize the kind of dim light you’re working with is half the battle — and often the key to capturing the right mood. Low light can be dreamy, dramatic, warm, cool, or downright tricky, depending on the source.
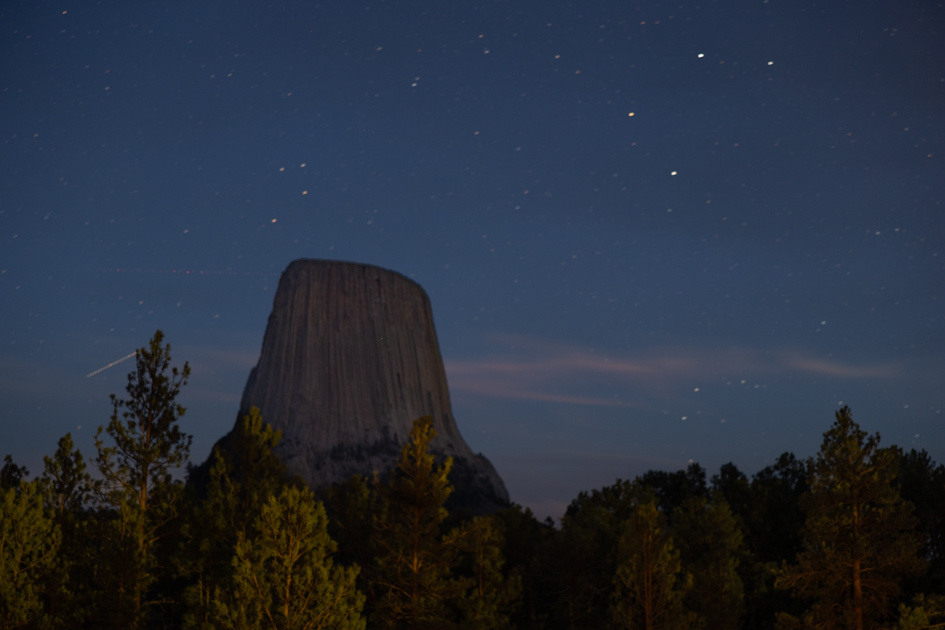
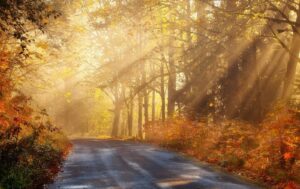
Blue Hour: Soft, Cool, and Dreamy
That magical window just after sunset or before sunrise gives everything a calm, bluish cast. It’s perfect for landscapes, small towns starting to glow for the evening, or quiet moments like the soft predawn haze I love photographing near home when the deer wander into the fields. Blue hour is subtle — and forgiving — so it’s a great place to start practicing.

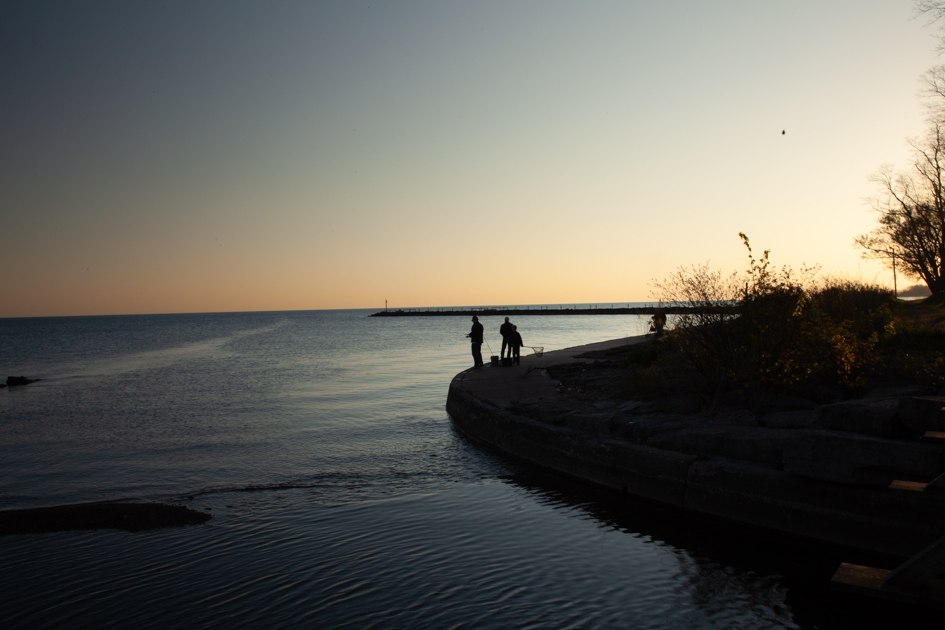
Twilight and Dusk: Rich Colors and Deepening Shadows
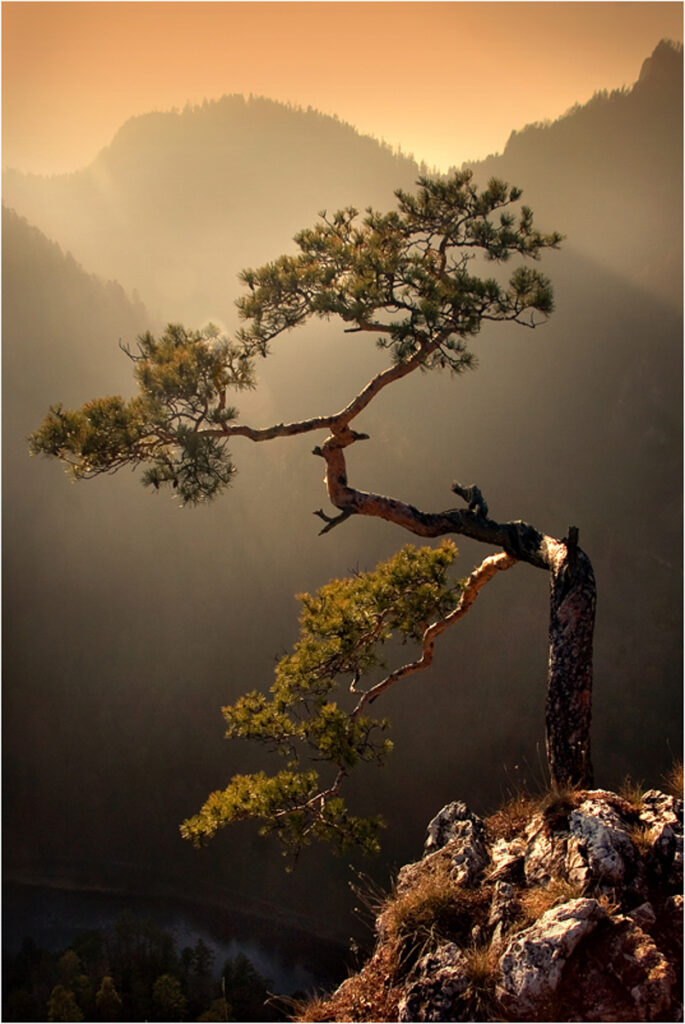
This is when the world still offers a hint of color — golds, oranges, purples — but the shadows begin to deepen. When I went to Death Valley, dusk gave the tree and background a cinematic glow that made every frame feel like a postcard.
Indoor Ambient Light: Warm, Atmospheric, Often Tricky
Cafés, museums, restaurants, and cozy corners all fall into this category. Think of places like Green World Coffee on Oahu or a dimly lit beachside grill — warm light, lots of mood, and a chance for your camera to capture texture and story. Indoors, you’re often juggling mixed light sources, which we’ll talk about later.
Artificial Urban Light: Neon, Street Lamps, and Storefront Glow
Cities can be wonderful for low-light shooting because artificial light creates contrast, reflections, shadows, and unexpected color casts. It’s not just for big cities — even small towns and historic districts have hidden gems after dark.
Wildlife in Low Light: Subtle, Quiet, and Requires Patience
Some of the most magical wildlife moments happen in low light — like watching deer coming over a mountain at sunset or photographing elk just as fog starts to roll across a field. Low light forces you to slow down, observe behavior, and work intentionally — just like in my Wildlife Encounters on America’s Back Roads and The Season of Eaglets posts.
Section 3: Essential Gear for Low-Light Success
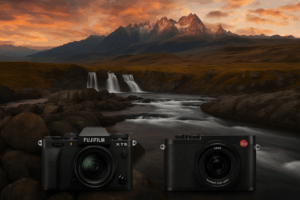
Low light doesn’t demand a suitcase full of gear — but having the right tools can make the experience smoother, sharper, and far less frustrating. Whether you’re shooting on the road with a Leica Q3, hiking with a Fuji X-T5, or grabbing a quick handheld shot before dinner, these pieces of gear help you work with the darkness instead of fighting it.
Fast Lenses: Your Best Friend After Sunset
A fast lens (f/1.4, f/1.8, f/2.0) lets in more light, helps you keep ISO lower, and creates that dreamy, creamy background blur we all secretly love.
Fuji 35mm f/1.4 – A low-light superstar.
Leica Q3’s f/1.7 lens – Practically built for night café scenes and dimly lit travel shots.
Fast lenses also help indoors — whether you’re in a cozy coffee shop on Oahu or photographing your grandchildren in a softly lit room. See my post on the Best Travel Lenses for Fujifilm X-T5.
A Camera That Performs Well at High ISO
Both the Q3 and X-T5 shine here. Modern sensors handle noise beautifully, so don’t be afraid to bump the ISO higher than you’re used to. Noise is better than blur — and many low-light images look even moodier with a touch of texture.
You’ve heard me say this in Mastering RAW + JPEG on the Road: the RAW files from both systems give you lots of room to recover shadows and tame noise later in Lightroom.
A Tripod (or Anything Stable)
Tripods are classic low-light companions, but you don’t always need a full-size setup.
Think:
• a compact travel tripod
• your bike’s handlebars
• a fence post along a scenic overlook
• a rock, a railing, a sturdy table
I’ve taken some of my favorite long-exposure photos by simply bracing the camera on whatever was nearby — slow travel encourages creative solutions.
Image Stabilization: The Unsung Hero
The Q3’s stabilization and the Fuji’s IBIS are lifesavers when shooting handheld in dim situations. Image stabilization gives you a few extra stops of flexibility — meaning you can shoot slower shutter speeds without blur. Perfect for capturing pictures at dusk or the soft early-morning light filtering through your backyard trees.
A Small, Discreet Light Source
You don’t always need a big flash. A tiny LED panel or even your phone light can gently shape a foreground object or add catchlight to eyes — without overpowering the natural mood. Just keep it subtle.
Extra Batteries and Fast Memory Cards
Low-light shooting can drain batteries faster, especially with long exposures or image stabilization. And fast cards (V90s) help you avoid buffering delays — crucial when the perfect low-light moment happens for just a few seconds.
A Quick Note About What I Shoot With
Throughout this post, you’ll see me mention both my Leica Q3 and my Fuji X-T5 — the two cameras that come with me on every trip. The Leica is my quiet, low-light dream machine, perfect for café interiors, twilight street scenes, and those soft, moody moments I love to capture on the road. My Fuji X-T5 brings flexibility, film simulations, and lenses like the 35mm f/1.4 and 70–300mm, which shine in everything from wildlife at dusk to creative storytelling. If you want to dive deeper into how I use each system, you can explore my dedicated posts on shooting with the Leica Q3 and my full Fuji X-T5 setup. Both play a huge part in how I approach low-light photography.
- Leica Q3 and How I Pair It With My Fujifilm X-T5 for Travel Photography
- Leica Q3 Travel Camera Review: The Ultimate All-in-One Travel Camera for Photography Enthusiasts
- Why the Leica Q3 is the Ultimate Travel Camera for Photographers
- Building a Travel Photography Kit with the Fuji X-T5
- The Best Lenses for the Fuji X-T5: My Travel Photography Go-To’s
- Why I Chose Leica and Fuji for Travel Photography
Section 4: Camera Settings Made Simple — ISO, Aperture, Shutter Speed, and How to Balance Them in Low Light
Low light can feel overwhelming because everything gets harder at once — your shutter slows down, noise creeps in, and your camera starts to feel just a little too honest with you. But once you understand how to balance your settings, low-light shooting becomes fun, creative, and surprisingly intuitive.
Let’s break it down the way you’d adjust things in the field — one thoughtful step at a time.
Start With Aperture: Open Up the Lens
In low light, aperture is your first tool.
Open it all the way — f/1.4, f/1.7, f/2.0 — and let the light pour in.
Why it works:
• You get a brighter exposure.
• You keep ISO lower.
• You create beautiful depth and mood.
The Fuji 35mm f/1.4 and Leica Q3 at f/1.7 are perfect for this. Indoors, especially at places like shooting inside a bar such as Full Throttle Saloon in Sturgis where the variety of light sources come into play, a wide aperture gives your images that warm, intimate feel without needing extra light.

Next Adjust ISO: Don’t Be Afraid to Raise It
Here’s my firm opinion after years of shooting: noise is better than blur.
Modern sensors (including my two cameras, handle high ISO gracefully, and a little grain actually enhances the mood of low-light scenes.
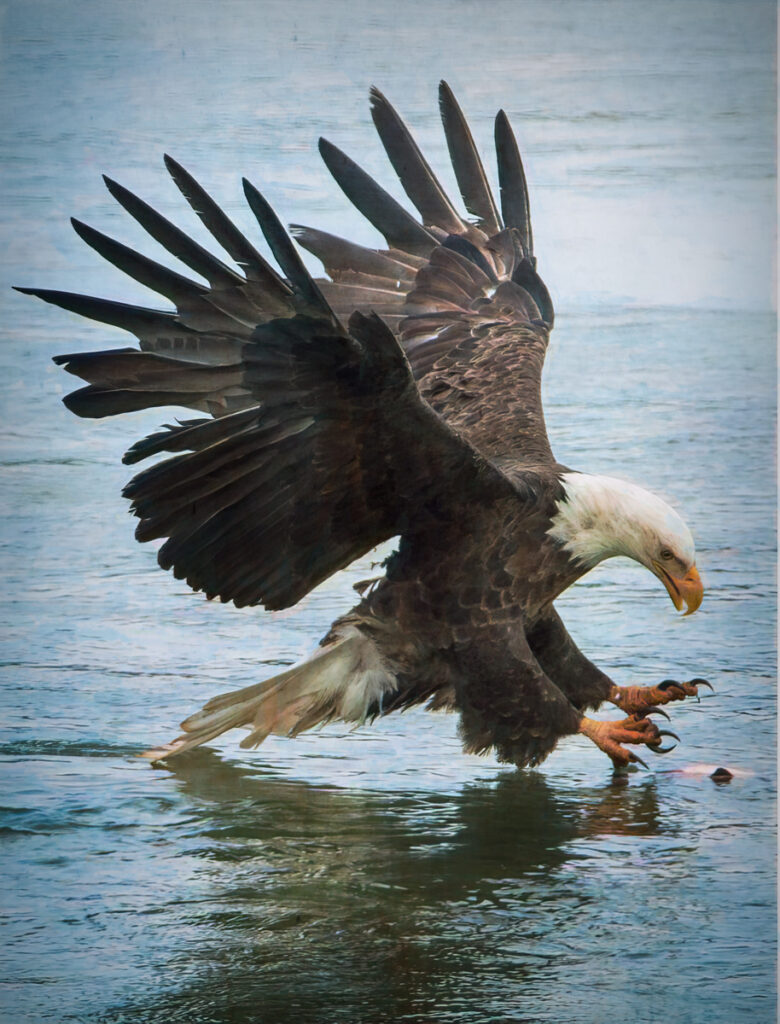
If you’re photographing wildlife at dusk — like the eagles on the riverbank or the deer in a field — it’s far better to raise ISO to 3200 or 6400 than to end up with soft images.
Then Set Shutter Speed: Keep It Just Fast Enough
Shutter speed is where low-light magic lives.
Your goal is simply to keep it fast enough to avoid motion blur — whether from your hands or your subject.
General starting points:
• Still scenes on a tripod: 1–2 seconds (long exposure)
• Handheld with stabilization: 1/30–1/60
• People moving slowly: 1/100–1/160
• Wildlife at dusk: 1/250–1/500 or even higher if they are moving
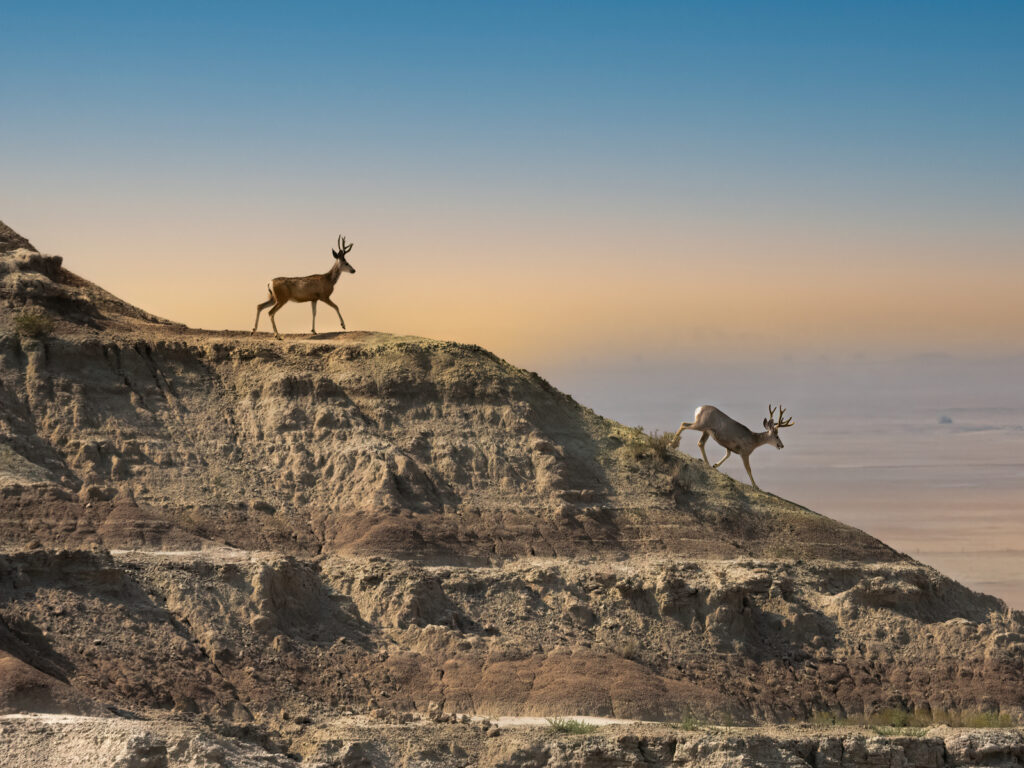
When I photographed the mule deer in the Badlands as shown above, light was fading fast — but keeping a fast shutter mattered more than keeping ISO low. The moment only lasts a second, and shutter speed protects it.
Let Your Histogram Be Your Guide
In low light, your screen can fool you.
Use the histogram to make sure you’re not losing too much detail in the shadows unless you want to — low-light images often look better with deep, clean shadows for mood.
Expose to protect highlights and let the rest fall into place. I can’t emphasize this enough. I depend on my histogram and it rarely lets me down.
Switch to Manual or Shutter Priority
Manual mode gives you full control, especially when the scene is changing quickly.
Shutter Priority also works beautifully when you’re photographing wildlife, street scenes, or children indoors — anything that moves unpredictably.
The Fuji and Leica both handle these modes intuitively, and you’ve likely found that fine-tuning settings on these cameras feels more natural the longer you shoot with them.
Section 5: Techniques to Steady Your Shot — How to Keep Images Sharp in Low Light
Low light has a way of revealing every tiny wobble in your hands — a reminder that even the steadiest photographers sometimes sway like palm trees in a breeze. But with a few simple techniques, you can keep your shots sharp, your ISO reasonable, and your frustration level delightfully low.
Use Your Body as a Tripod
Think of yourself as a human stabilization system.
• Pull your elbows into your ribs
• Sink your weight slightly
• Press the camera gently against your face
It’s the same stance you naturally fall into when photographing wildlife near your home — that quiet stillness when you’re watching for an eagle to lift off or the deer to step into the field.
Lean, Brace, or Anchor
Anything solid around you can be turned into free stabilization:
• A tree trunk
• A railing on a scenic overlook
• A storefront wall
• Your bike’s handlebars (a trick I used more than once riding into Tarpon Springs at dusk)
These improvised supports can give you an extra stop or two of steadiness — sometimes enough to halve your ISO or slow your shutter speed safely.
Use Burst Mode for Handheld Sharpness
This is one of my favorite low-light hacks:
Shoot a short burst of 3–5 frames.
Often the middle frame is sharper because your hands naturally settle between clicks.
The Leica Q3 and Fuji X-T5 both handle bursts beautifully, and this technique works especially well when photographing people, wildlife, or street scenes with gentle movement.
Control Your Breathing
It sounds silly until you try it.
Just like with wildlife photography, timing matters.
• Exhale
• Hold for a half-second
• Then gently press the shutter
It’s the same technique used when photographing eagles preening or elk moving slowly through the fog — small adjustments that make a big difference.
Take Advantage of Image Stabilization
Both of these cameras give you a major edge in this category.
IBIS (in-body stabilization) helps counteract handshake, meaning you can shoot handheld at slower shutter speeds without blur — perfect for those warm, ambient scenes inside coffee shops or the twilight glow of a city street.
Use a Remote or the Self-Timer
If your camera is braced on something stable, even the act of pressing the shutter can shake it.
A 2-second timer clears the vibration, giving you a crisp, clean frame — especially helpful for long exposures of waterfalls, nighttime street scenes, or scenic overlooks.
Know When to Stop — Some Scenes Need a Tripod
Handheld tricks go a long way, but some shots simply require stillness:
• Night skies
• Long-exposure waterfalls
• Light trails
• Dimly lit interiors where you want max detail.
This is where your compact travel tripod earns its keep.
Section 6: Creative Techniques That Shine in Low Light — Mood, Color, Movement & Shadows
Low light isn’t just a technical challenge — it’s an artistic playground. Once you stop worrying about numbers on the screen and start paying attention to the atmosphere around you, low light becomes one of the most expressive tools in your photography toolkit. These techniques help you lean into mood, intentional blur, and subtle details that simply don’t exist at high noon.
Lean Into the Mood — Let the Darkness Tell the Story
Low light naturally adds emotion to a scene.
The shadows deepen. The colors shift. The glow from a window or streetlamp becomes the hero.
Think of places like the beach at dusk or the quiet corners of Green World Coffee Farm before the morning crowds. The story isn’t just in the subject — it’s in the feeling of the light.
Ask yourself:
What emotion does this darkness add? Quiet? Mystery? Warmth? Nostalgia?
Use Selective Light to Guide the Eye
When light is scarce, whatever is lit becomes the focal point.
Use this to your advantage:
• A single lantern in a small town
• A glow from a café window
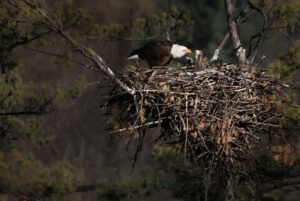
• The rim light wrapping around a heron on its nest
• The soft streetlight illuminating a bike trail after sunset
Low light simplifies the frame and makes compositions stronger — a companion idea to what I discuss in Mastering Composition on the Road.

Play With Color Temperature
Low light often mixes warm and cool tones:
• Blue hour gives a gentle, cool atmosphere
• Streetlights add gold, amber, or even greenish hues
• Neon signs bring pops of unexpected color
Instead of correcting everything in post, sometimes it’s more powerful to embrace the mixture. It adds character and authenticity — especially in travel storytelling.
Try Intentional Motion Blur
Low light gives you slower shutter speeds by default — which means you can lean into movement instead of fighting it.
Some ideas:
• Water smoothing into silk
• People walking through a dim marketplace
• Cars painting light trails across a city street
• Waves softening along a shoreline
The world feels more magical when motion becomes part of the image.
Experiment With Silhouettes
When your subject is backlit, let the shadows go fully dark.
Silhouettes are perfect at:
• Blue hour
• Sunset
• Dusk
• Dim interiors with bright windows
They create simple, powerful shapes that stand out — especially for landscapes or wildlife moments like an eagle perched against the sky.
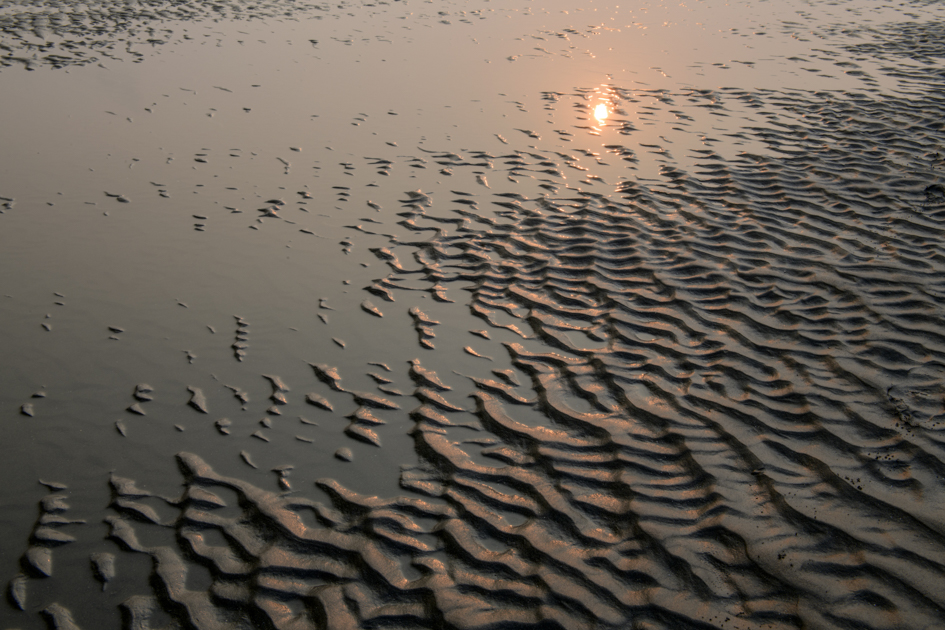
Use Reflections to Add Light Where There Isn’t Any
Water, windows, glossy streets after rain — these surfaces amplify whatever light is available.
This is especially effective near rivers, lakes, or coastlines at twilight. Even a small puddle can create an interesting composition when the surrounding light is low.
Embrace Grain and Texture
Low light often brings noise — but that texture can actually add mood, especially in documentary-style travel photos. Instead of smoothing every pixel in Lightroom, consider keeping just enough grain to retain the feeling of the scene.
Section 7: Editing Low-Light Images — Bringing Out Detail Without Losing the Mood
Editing low-light photos is all about balance. You want to lift shadows just enough to reveal the story — without stripping away the depth, mood, and mystery that made the scene beautiful in the first place. The goal isn’t to make a night photo look like it was taken at noon. It’s to honor the atmosphere you felt when you pressed the shutter.
Here’s how to edit thoughtfully, intentionally, and in a way that preserves the soul of your low-light images.
Start With Exposure — Lift, Don’t Blast
Gently raise exposure, but only enough to bring out meaningful detail.
Low-light images look best when shadows stay rich and natural.
If you lift everything evenly, that atmospheric nighttime glow disappears.
Think of scenes like the warm storefronts or the soft lighting inside Green World Coffee Farm — the shadows belong there.
Use Selective Adjustments Instead of Global Fixes
Your Lightroom brush, radial filter, and linear gradient tools are your best friends here.
Use them to:
• Brighten just the subject
• Recover detail in a face or foreground
• Add a hint of clarity to key objects
• Soften noise in the background only
• Add subtle warm or cool tint where the light source actually was
This keeps the mood intact instead of flattening the image.
Tame Noise — But Don’t Erase the Atmosphere
Noise reduction should be thoughtful, not aggressive.
A little grain adds texture and authenticity, especially in travel and documentary-style photos.
Both the Fuji X-T5 and Leica Q3 produce beautiful RAW files that hold up well to gentle noise reduction. Let the grain breathe — it’s part of the story.
Balance the Color Temperature
Low light sometimes produces funky color mixes: amber streetlights, bluish shadows, neon highlights. Instead of “fixing” everything, guide it toward what you felt.
Helpful trick:
Warm tones add coziness.
Cool tones add calmness.
Mixed tones add realism.
Add Contrast to Bring Back the Drama
Low-light shots sometimes get muddy after lifting shadows.
A touch of contrast — or smarter yet, micro-contrast using texture and clarity — restores structure without losing depth.
Use it lightly, especially with Fuji RAW files, which respond beautifully to small adjustments.
Use Vignettes (Real or Added) to Keep Focus on the Subject
A subtle vignette pulls the viewer’s eye inward, especially when your frame includes light falloff from natural or ambient sources.
This works beautifully for:
• Streetlights
• Café scenes
• Lantern-lit moments
• Wildlife framed against dusk
Just keep it natural — if you can see the vignette, it’s too strong.
Preserve the Mood Above All Else
The biggest mistake in low-light editing is over-correcting.
Low-light photos are supposed to be moody, mysterious, soft, and atmospheric. That’s their magic.
If your edit no longer “feels” like the scene you captured, pull back. Mood matters more than technical perfection.
Section 8: Real-World Scenarios — How to Handle Low Light on the Road, on the Trail, and in Everyday Life
Low light shows up everywhere — whether you planned for it or not. These real-world examples walk through how to handle different situations you’re likely to encounter on your travels, during family moments, and even around your own home (where the deer and eagles keep giving you unexpected photography “assignments”).
Twilight on the Road: When You’re Still Exploring After Sunset
Maybe you’re finishing a scenic drive through the Southwest, driving Blue Ridge Parkway, or rolling into a small town just as the neon signs flicker on.
These moments are calm, colorful, and deeply atmospheric.
How to shoot it:
• Aperture wide open (f/1.4–f/2.0)
• ISO 1600–3200
• Shutter speed: 1/60–1/125 depending on movement
• Look for streetlights, reflections, shop windows, or headlights to anchor the scene
Twilight is about storytelling — capturing what it felt like to arrive, not just what it looked like.
Wildlife at Dusk — Quiet and Quick
Dusk is when wildlife gets active: elk stepping into open fields in Yellowstone, deer moving through your yard, or eagles settling into their roost along the riverbank.
How to shoot it:
• Shutter takes priority: 1/250–1/500
• ISO becomes your friend (3200–6400 if needed)
• Keep your lens wide open
• Expect the moment to be brief — this is where burst mode shines
I had my settings all set on the camera and was able to take this shot. It was over in a second.
Dim Interiors — Coffee Shops, Cafés, Museums, and Historic Spaces
Some of your favorite travel memories happen indoors:
• a warm cup at Green World Coffee Farm
• dinner at your favorite Italian restaurant
• a historic exhibit bathed in soft window light
Low interior light is intimate and inviting — if you treat it gently.
How to shoot it:
• Aperture wide open
• ISO 1600–4000
• Shutter 1/60–1/125 (or brace against a table/doorframe)
• Let the natural warm light do the heavy lifting
Indoors is the perfect place to embrace mood.
Night City Scenes — Streets, Storefronts, and Color
Even small towns shine after dark. Streetlamps, signage, and windows create natural spotlights that make compositions easy and cinematic.
How to shoot it:
• Manual or Shutter Priority
• ISO 3200+
• Stabilize whenever possible
• Look for reflections — puddles, windows, car hoods
You can read more in my storytelling posts Mastering Composition on the Road and Finding Creativity in the Everyday.
At Home: Capturing Family Moments in Soft, Natural Light
Low light isn’t just a travel thing. It’s the glow of your kitchen lamp, a quiet moment with a grandchild, a late-afternoon shadow stretching across the living room floor.
How to shoot it:
• Embrace high ISO
• Use window light as your main source
• Steady yourself and shoot bursts
• Capture emotion over perfection
These images become some of the most meaningful — reminders that creativity isn’t limited to landscapes or faraway adventures.
Section 9: Pro Tips — Small Tricks That Make a Big Difference in Low Light
Low light rewards patience, practice, and a few clever habits you can use no matter where you’re shooting — on the road, at home, or deep in a national park where the stars are brighter than the street signs.
These are the small adjustments that elevate your images from “decent in the dark” to “wow, I didn’t know low light could look like that.”
1. Use the Environment as Your Light Source
You don’t always need artificial light.
A phone screen, a lantern, a glowing storefront, a campfire, even a reflective menu at a restaurant — all of these can add subtle highlights or catchlights.
If it glows, it can be used.
2. Slow Down and Take Fewer, Better Frames
Low light encourages mindfulness. I cover this more in my post The Art of Mindful Photography.
Pause. Look deeper.
The best low-light shots often happen when you commit to a moment instead of rushing through it.
3. Keep Your Gear Simple
At night, the fewer decisions you have to make, the better.
One camera, one lens — and as mentioned I use a Leica Q3 and a Fuji X-T5.
Simplicity keeps you focused on the scene, not the settings.
4. Anticipate the Moment Before It Happens
Low light often means slower autofocus and tighter windows of opportunity.
Whether it’s photographing a heron preparing for takeoff or your grandchild leaning toward the birthday candles, be ready before the peak moment.
5. Use Manual Focus in Challenging Light
If autofocus starts hunting, switch to manual.
The Fuji’s focus peaking makes this easy, especially for backlit subjects or silhouettes during blue hour.
6. Add a Touch of Exposure Compensation
If you’re shooting in Aperture Priority or Shutter Priority, lowering exposure by –0.3 or –0.7 preserves highlights and keeps the mood intact.
This is especially effective at twilight, where cameras tend to over-brighten the scene.
7. Steady Yourself Between Frames
Take a breath, reset your stance, and fire another burst.
The middle frame is often the sharpest — a trick that’s saved many twilight moments along your travels.
8. Embrace Imperfection
Low-light photos naturally have:
• grain
• shadows
• soft edges
• deep contrast
Instead of fighting these things in Lightroom, use them to your advantage. Low light has character — let it shine.
9. Know When to Walk Away… or Come Back
Some scenes simply need more light than you have.
Instead of forcing the shot, come back earlier or later.
Good storytelling photography doesn’t require every moment — just the right ones.
Explore More + Wrap-Up
Low light isn’t something to fear — it’s something to embrace. Once you learn how to work with shadows, soft glows, and the quiet mystery that settles in after sunset, your photography opens up in ways midday light could never offer. Low light slows you down, sharpens your awareness, and invites you into moments most people overlook.
Whether you’re wandering the the paths at Grand Canyon at dusk, photographing the soft haze over coffee fields on Oahu, watching eagles settle along your riverbank at home, or simply capturing a quiet moment in your living room, low light helps you tell deeper, more meaningful stories. And as you continue to grow your travel photography toolkit — from composition to mindfulness to wildlife behavior — the way you work in low light becomes another defining piece of your creative style.
Explore More From My Mastering Travel Photography Series
If you enjoyed this post, here are more guides from my Mastering Travel Photography collection — a series built to strengthen your skills one thoughtful technique at a time:
Core Techniques & Foundations
- Mastering Composition on the Road
- Mastering RAW+JPEG on the Road
- Mastering Travel Photography Gear & Setup
- Travel & Photography Tips: Balancing the Journey
- Practical Travel Tips for Photographers
- Mastering the Histogram: A Simple Guide to Better Exposure
- Mastering Light in Landscape Photography
- Mastering Travel Photography for Beginners
Creativity, Mindfulness & Storytelling
- The Art of Mindful Photography
- Finding Creativity in the Everyday
- Mastering Using Reflection in Travel Photography
Wildlife & Nature Photography Skills
- Understanding Wildlife Behavior Before You Photograph
- Ethics & Respect for Wildlife
- Wildlife Encounters on America’s Back Roads
- Finding the Wild Close to Home
- Photographing Eagles: Lessons from the Riverbank
Each of these posts builds on the others, helping you develop a well-rounded, confident approach to shooting on the road — whether you’re exploring national parks, wandering through small towns, or creating meaningful images in your own backyard.
Final Thoughts
Mastering low-light photography isn’t about perfection. It’s about curiosity, patience, and noticing the moments that only reveal themselves when the world gets quiet. Once you begin to trust the shadows — to let the mood guide your storytelling — you’ll find that some of your most powerful images happen long after everyone else has put their cameras away. Feel free to contact me with any questions.
Join my newsletter to get more mastering photography posts and travel destinations.